

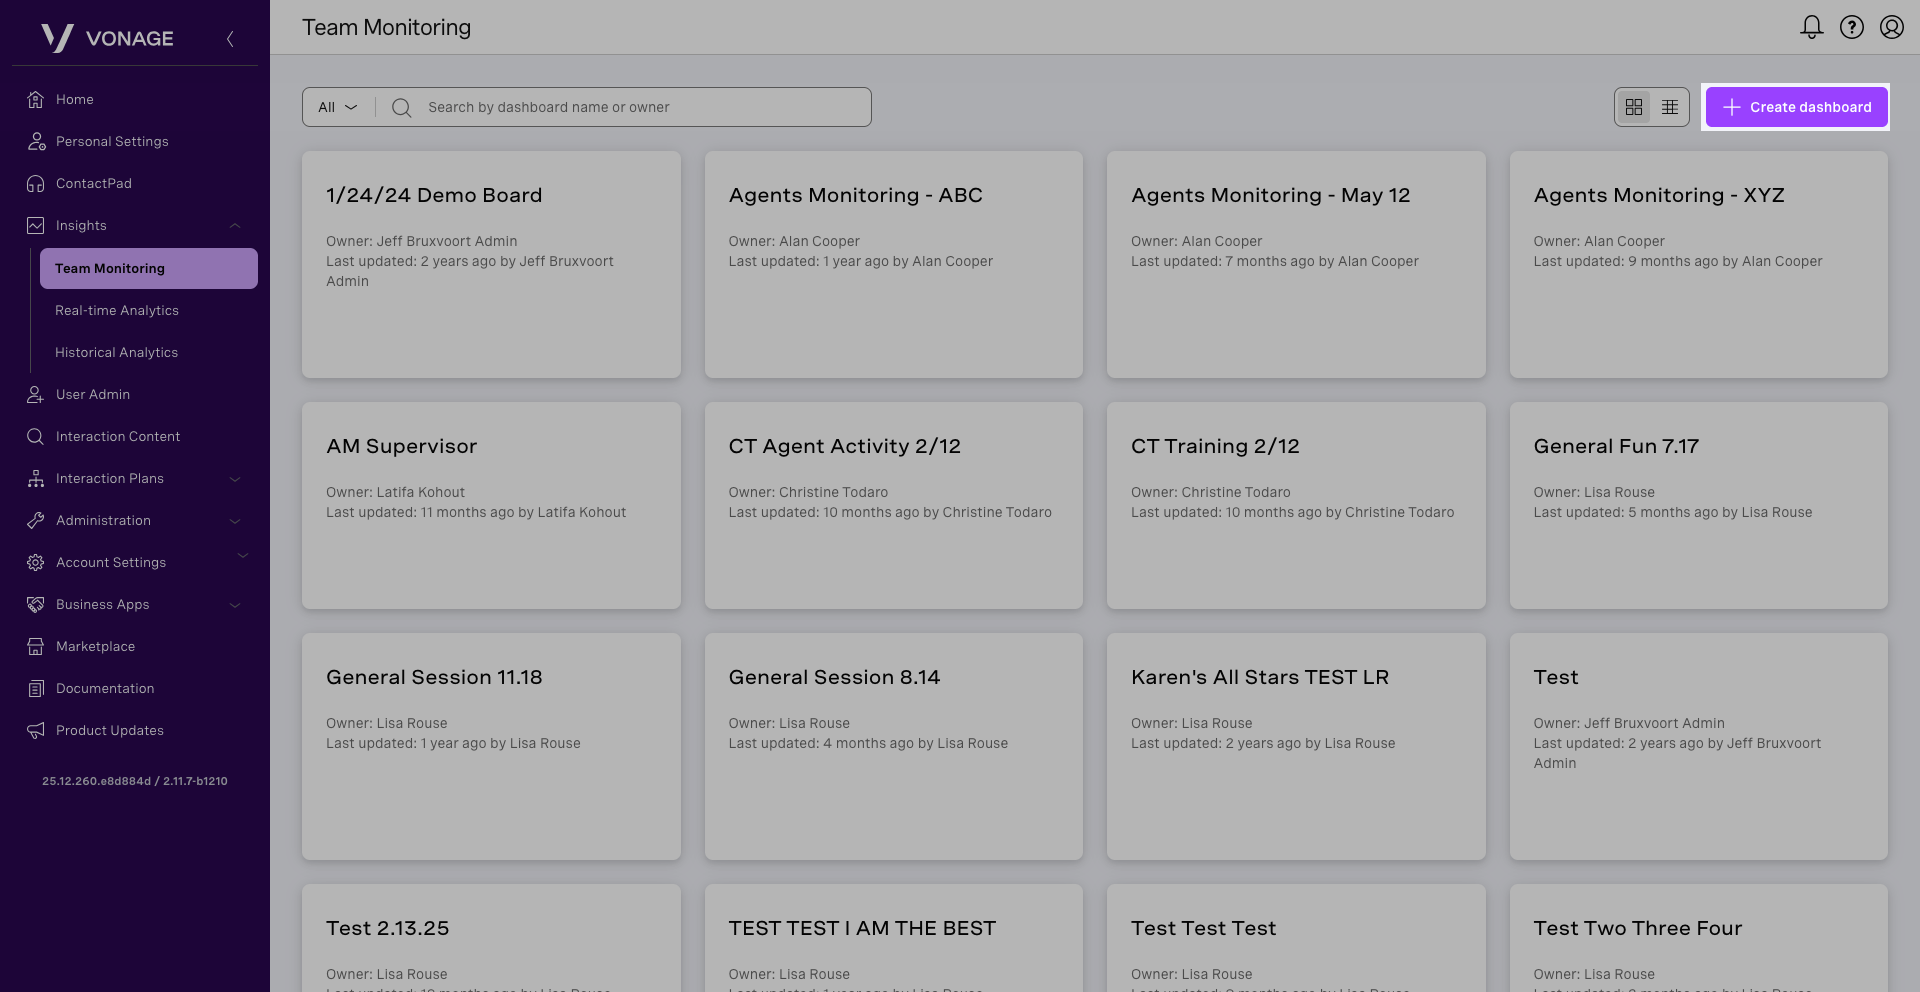
Team Monitoring
Team Monitoring serves as the main interface for call center supervisors. From the left-hand menu, select Insights and then Team Monitoring to open the feature. Supervisors can create dashboards that contain teams of agents, which they add individually or by user groups or skills. Supervisors can perform the following tasks:
- Identify and respond to emerging trends in real time.
- Adjust agent states to meet contact center demands.
- View agent presence and active interactions on each dashboard.
- Monitor, coach, or barge into agent calls.
- Access Real-time Analytics dashboards to monitor team performance.
Create a dashboard
To create a new dashboard, from the Team Monitoring page, click Create dashboard.
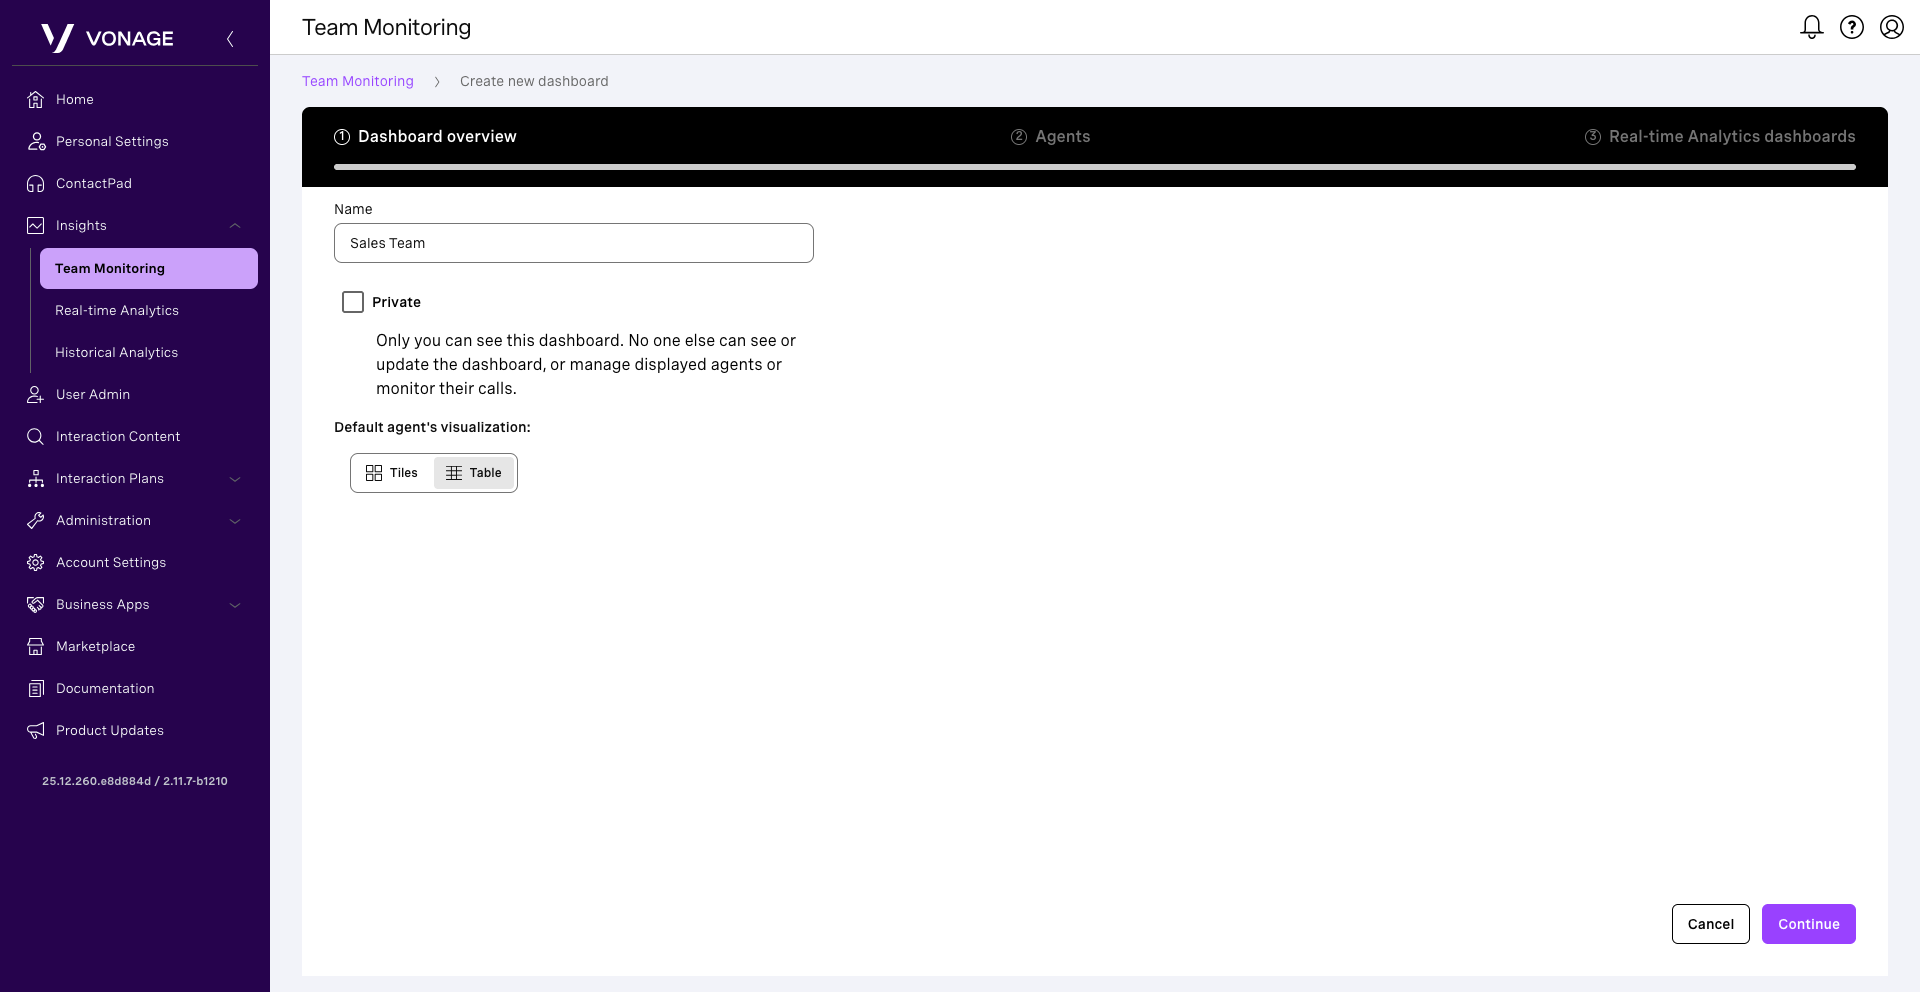
A new dashboard wizard appears. Perform the following steps:
In the Dashboard overview Enter a Name for the dashboard. Choose whether the dashboard is Private or visible to users with Team Monitoring access. Click Continue.
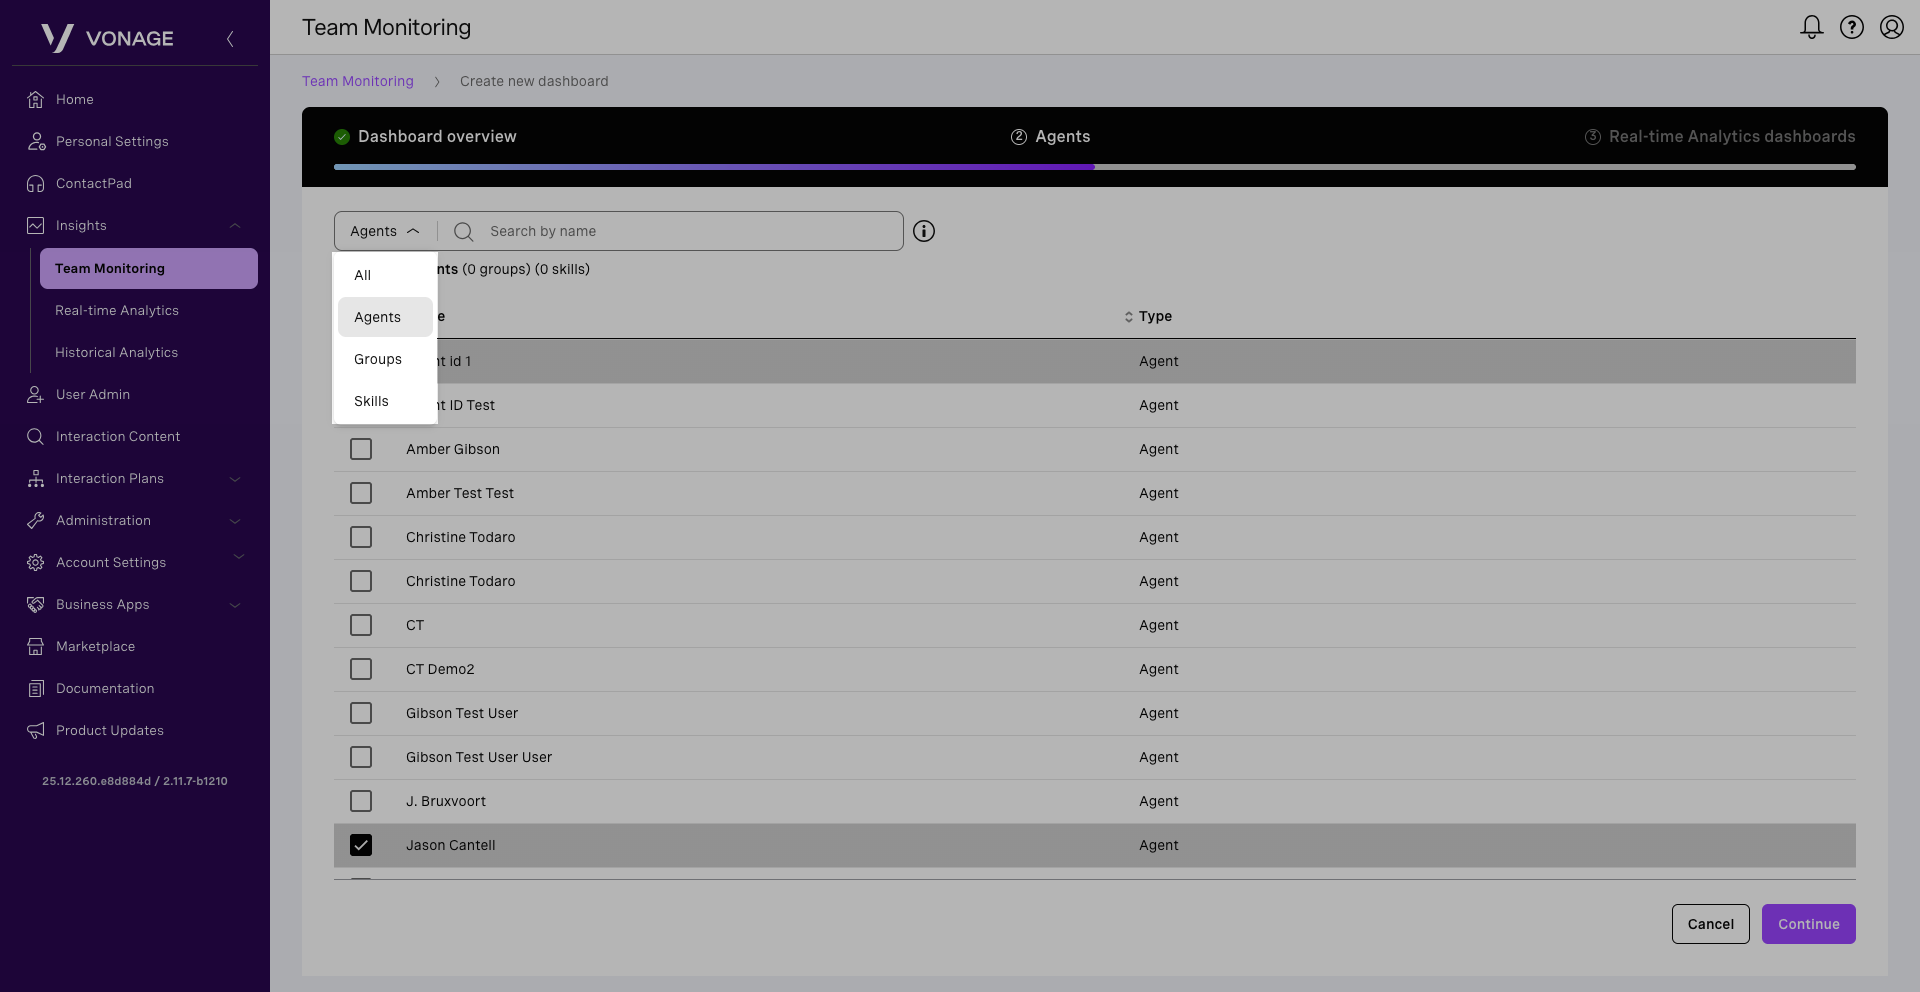
In Agents, you can add up to 200 agents. Search all agents, groups, and skills by name, or filter the list first to show only Agents, Groups, or Skills. Click Continue.
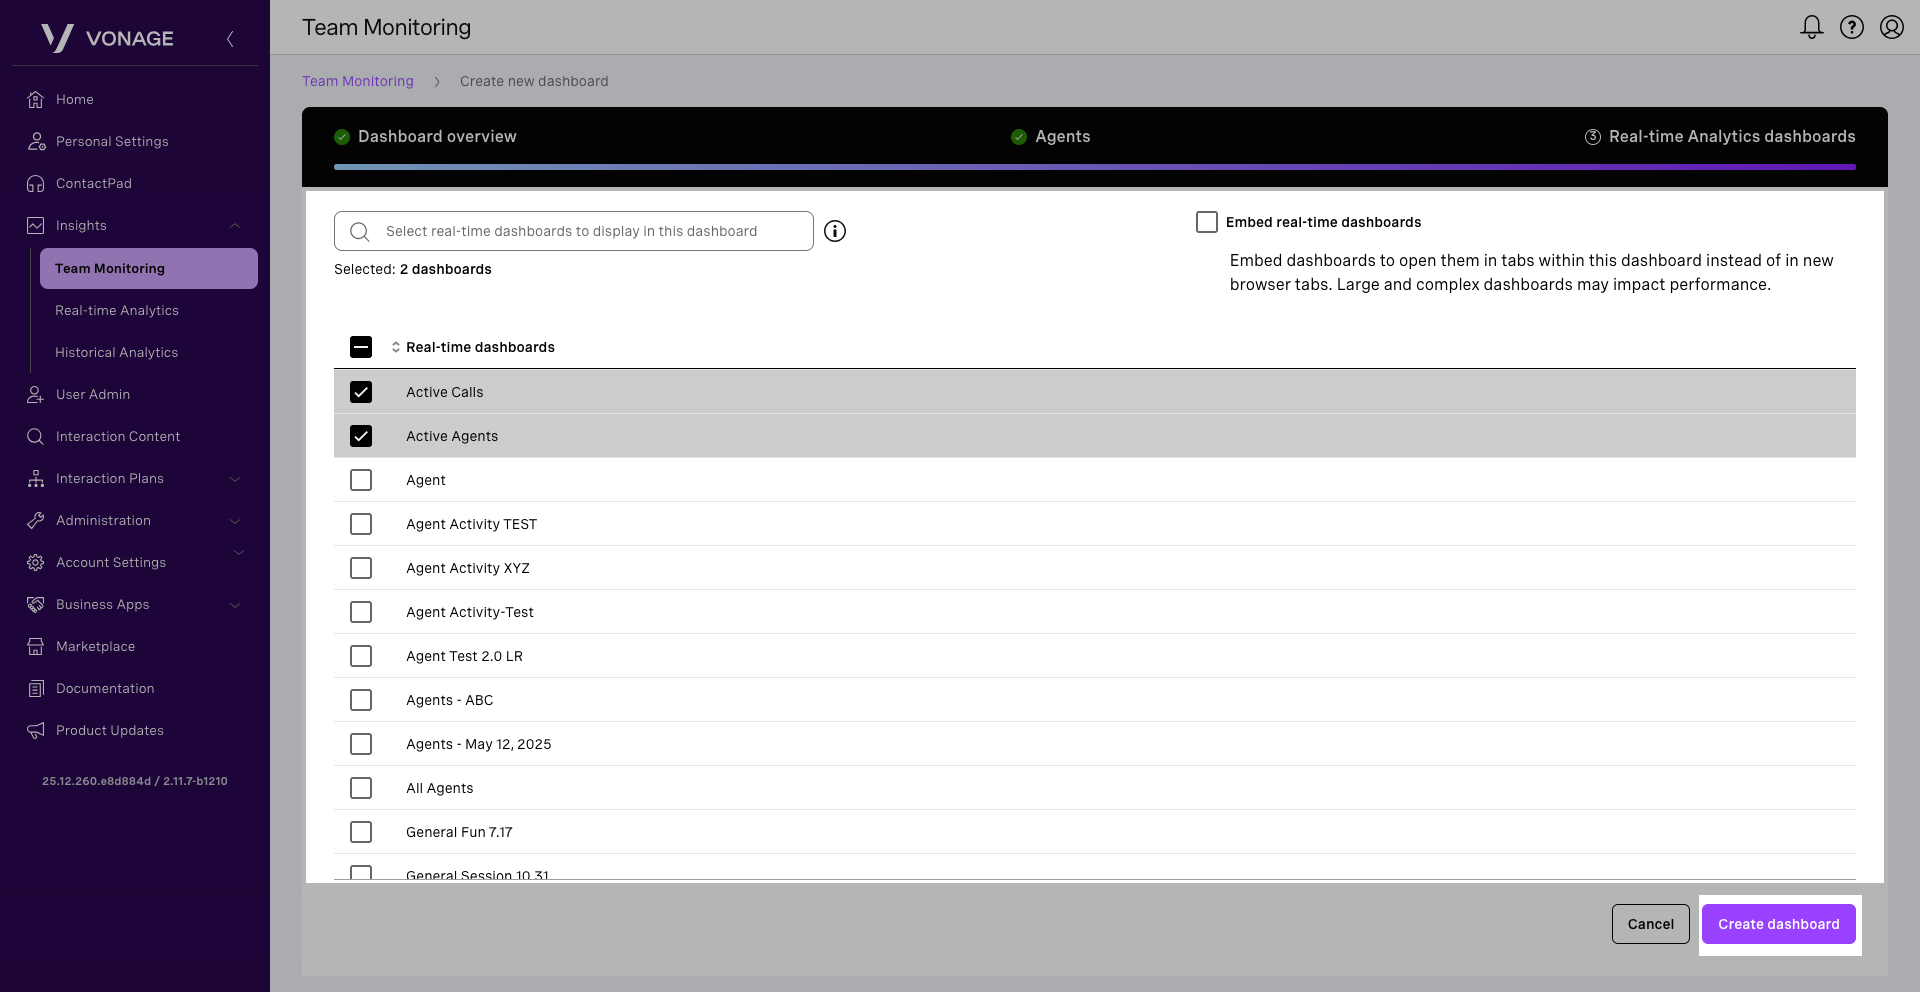
In Real-time Analytics dashboards, select up to three related Real-time Analytics dashboards to embed in or link to from the dashboard. Search available Real-time Analytics dashboards by name. Click Create dashboard.
The newly created dashboard appears in the Team Monitoring page.
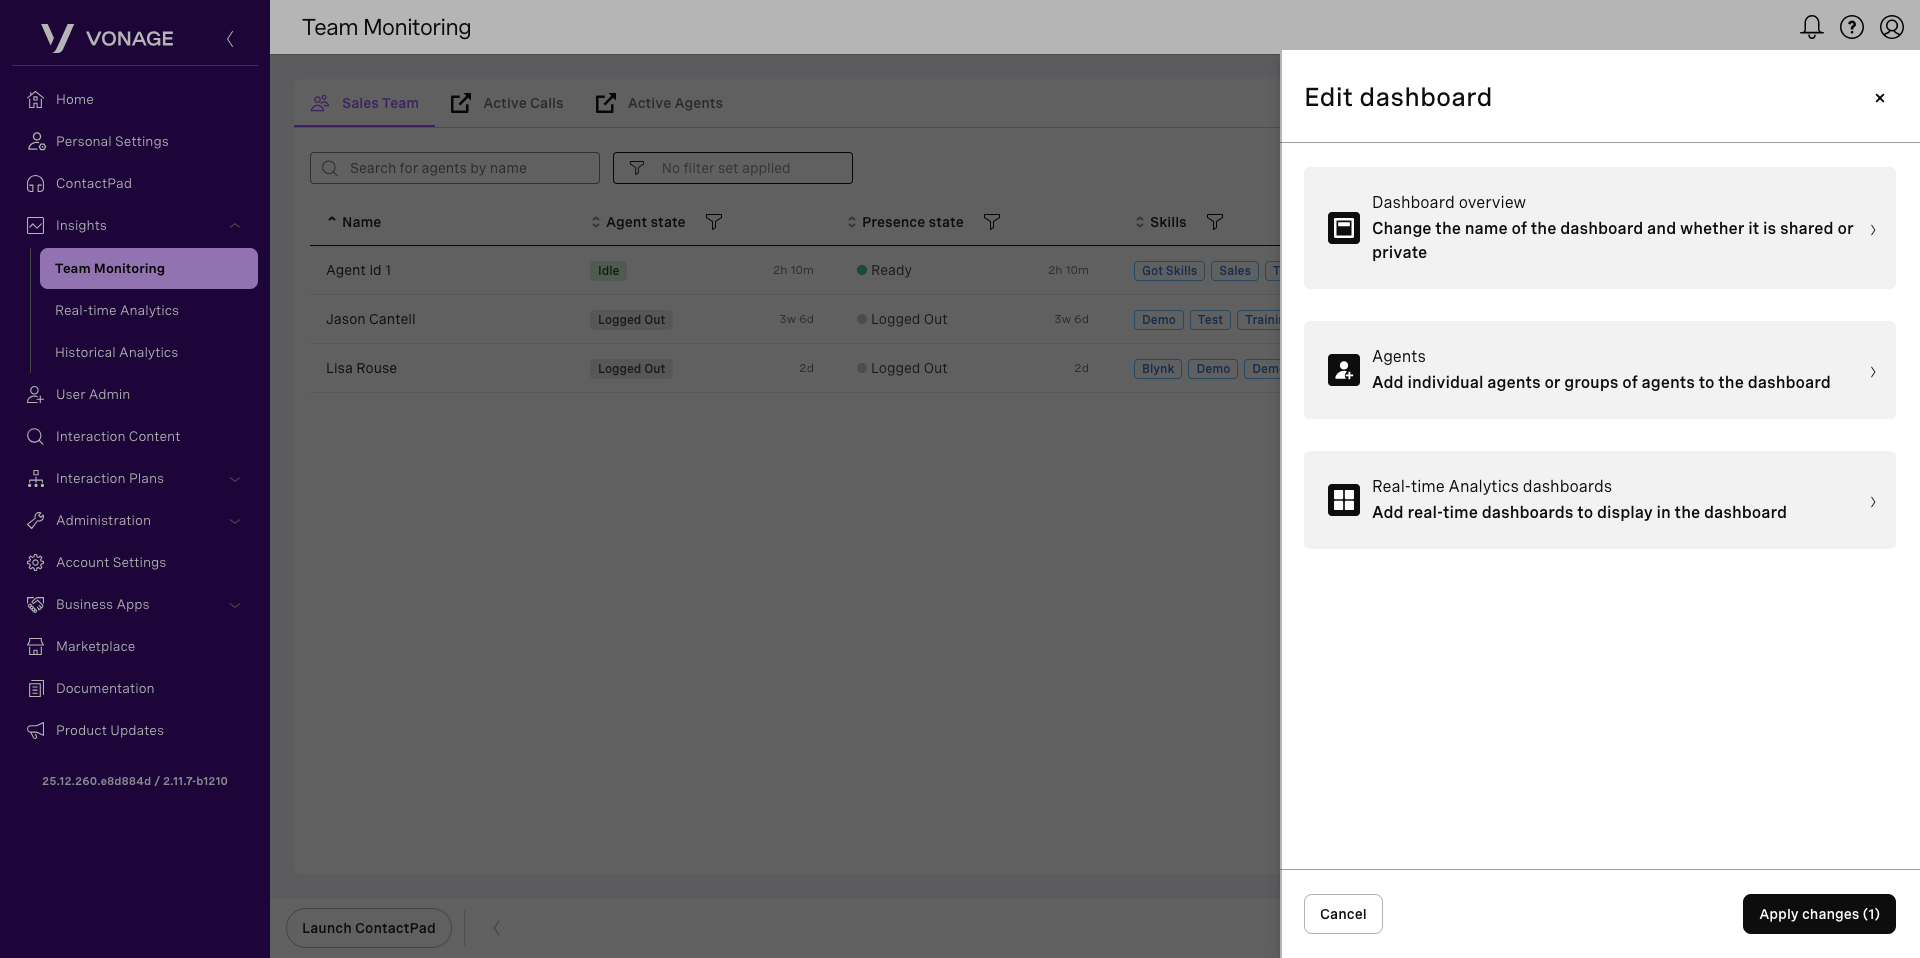
Edit a dashboard
To edit an existing dashboard, from the Team Monitoring page, select the dashboard you want to update. When the dashboard loads, click the Pencil icon to edit.
From there, you can modify any of the settings defined during creation. In the Dashboard overview, update the dashboard name and adjust its availability, noting that only the user who originally created the dashboard can set it to private. In the Agents section, add or remove agents. In the Real-time Analytics dashboards section, add or remove Real-time Analytics dashboards. When you finish, click Apply changes to save your updates.
Manage agents
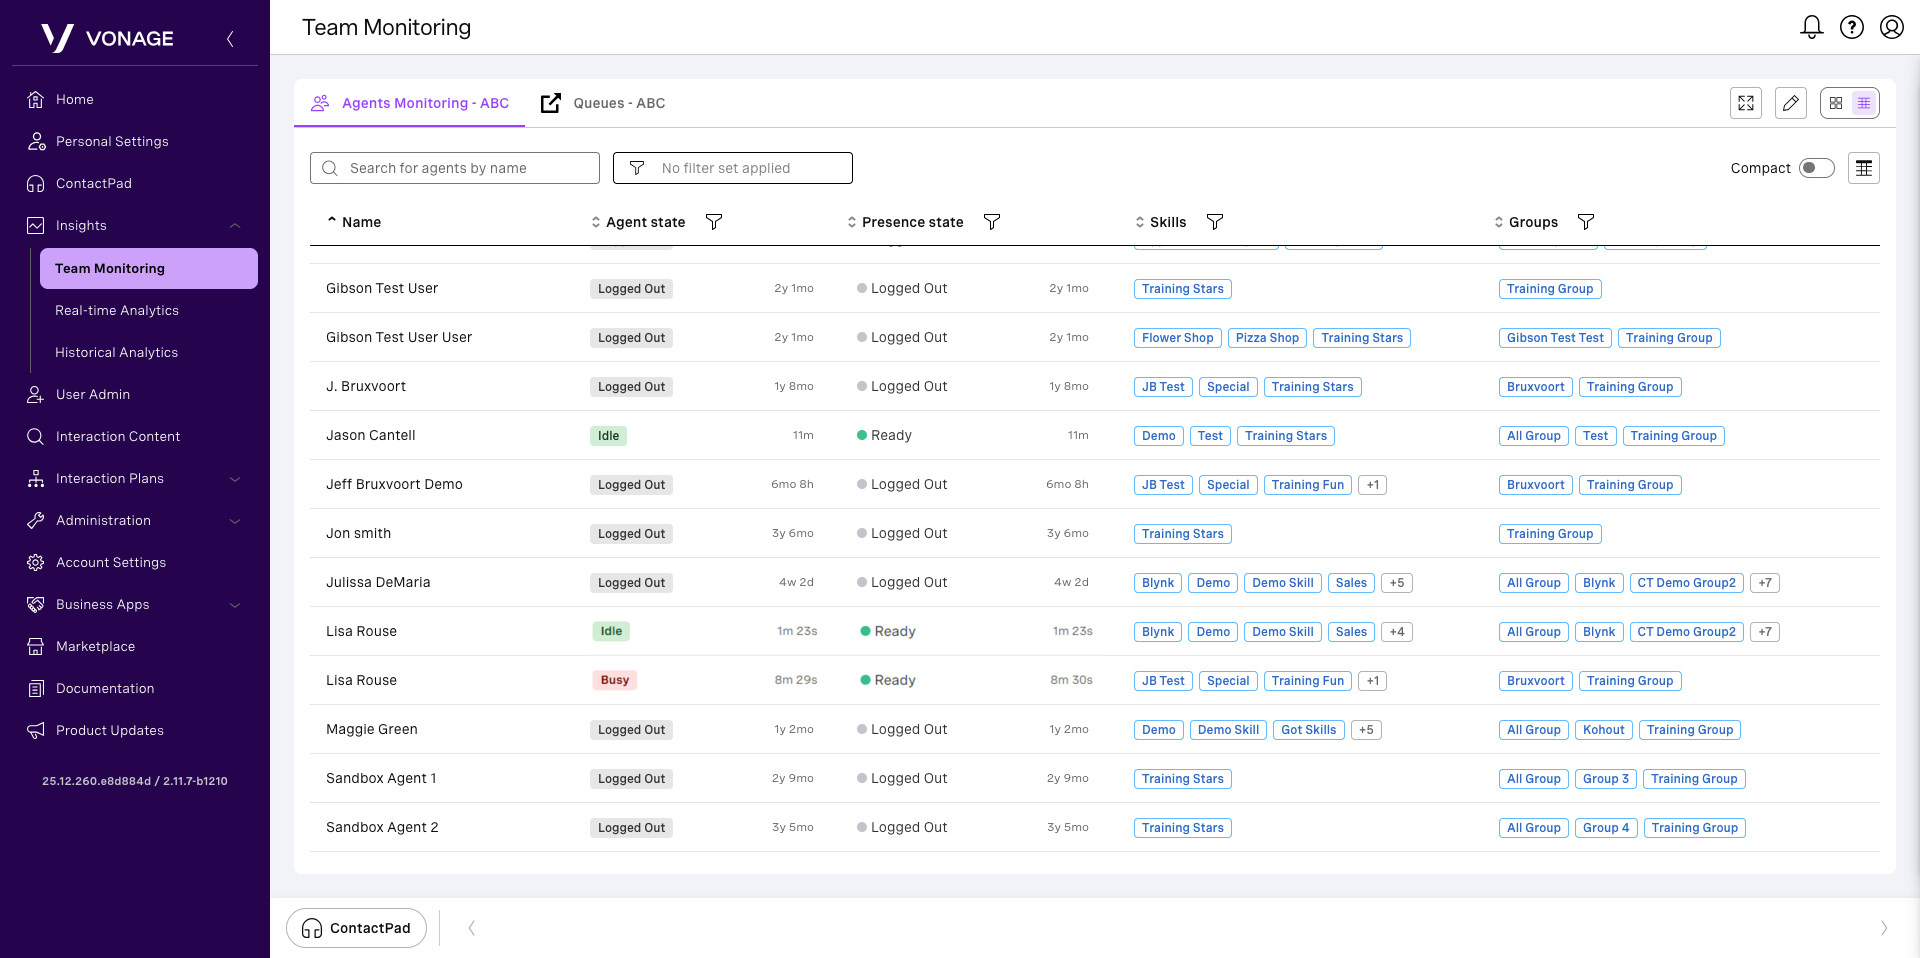
From Team Monitoring, locate the dashboard you wish to view, click its row or title. The dashboard appears. Depending on the configuration of your dashboard, one or more tabs appear. The first tab displays the dashboard itself. Any additional tabs contain linked or embedded Real-time Analytics dashboards that you have access to manage. To customize your view, click the table or list icon in the upper right.
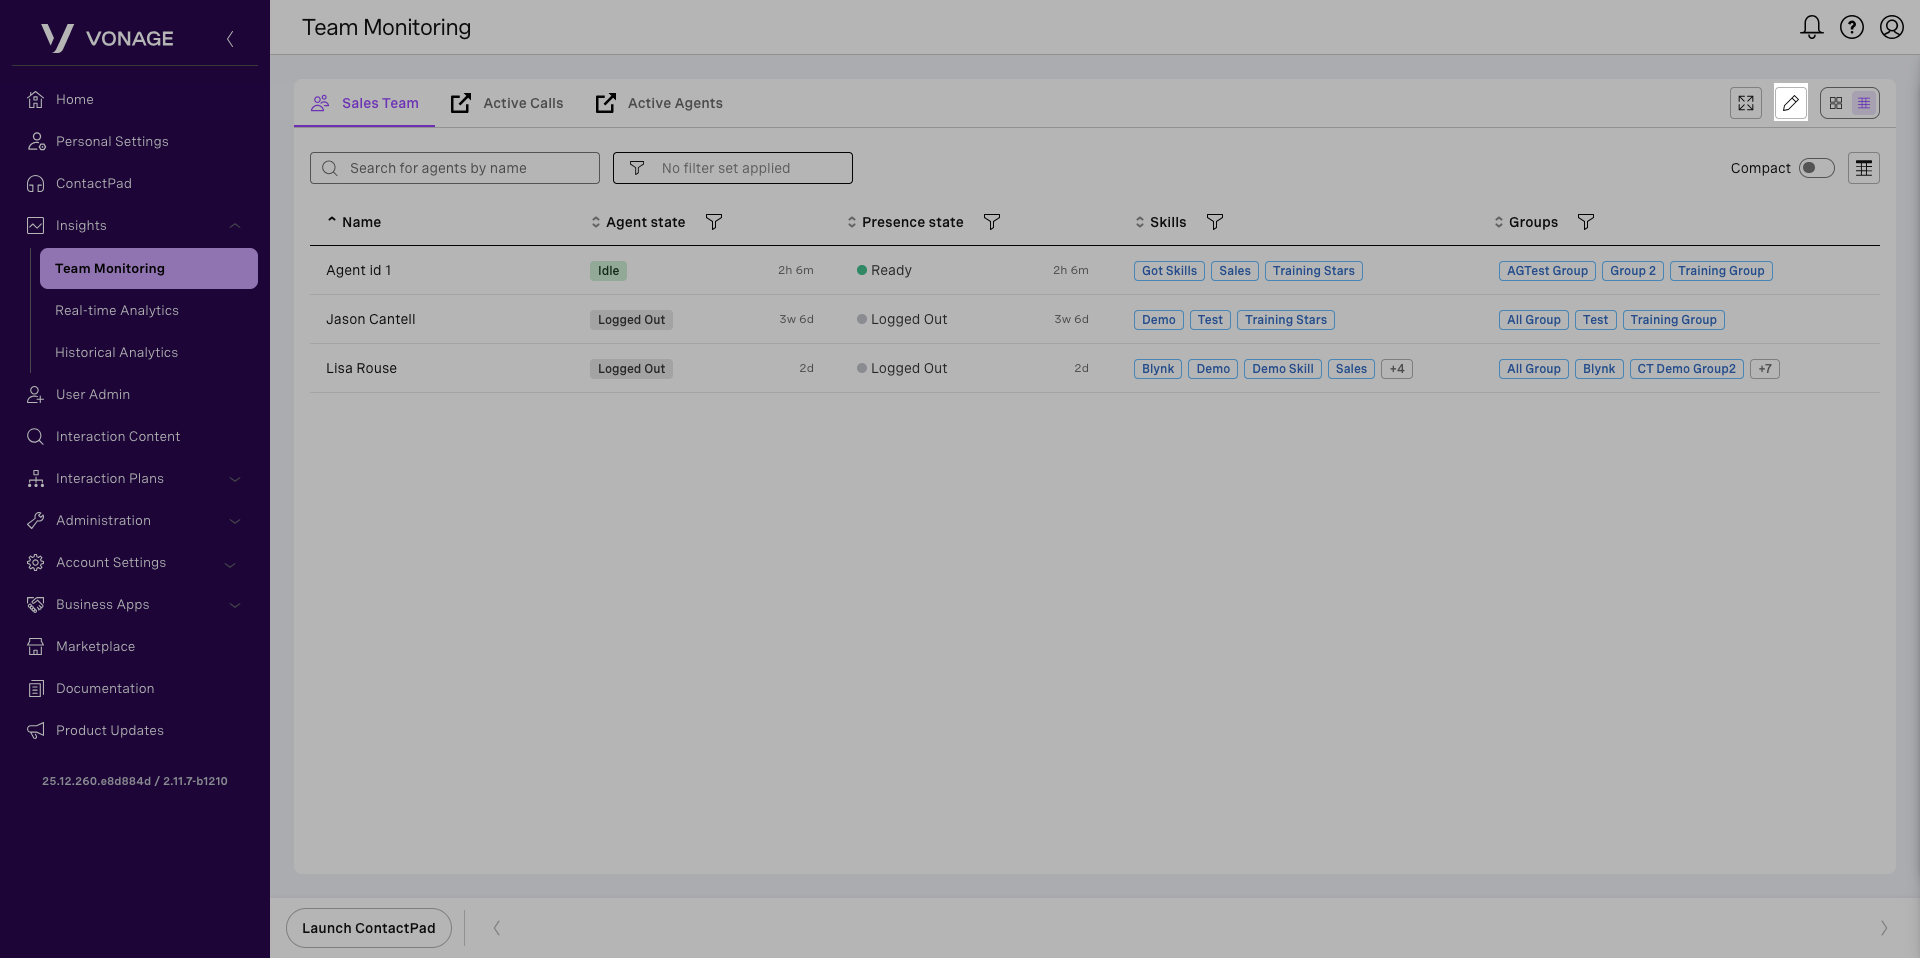
A Team Monitoring dashboard contains a list of agents. Each row in the list contains an agent and the following information relating to that agent:
- Name: The name of the agent as configured in User Admin.
- Agent state: The agent’s summary state, determined by combining the agent’s presence and interaction states.
- Presence state: The presence state indicates the agent’s current working state and their availability for new interactions. The time since the presence state last changed also appears and updates continuously.
- Interaction state: Gives an overview of the current states of interactions that the agent is involved in. The time since the interaction state changed also appears and updates continuously.
- Skills: A list of skills assigned to the agent.
- Groups: A list of groups the agent belongs to.
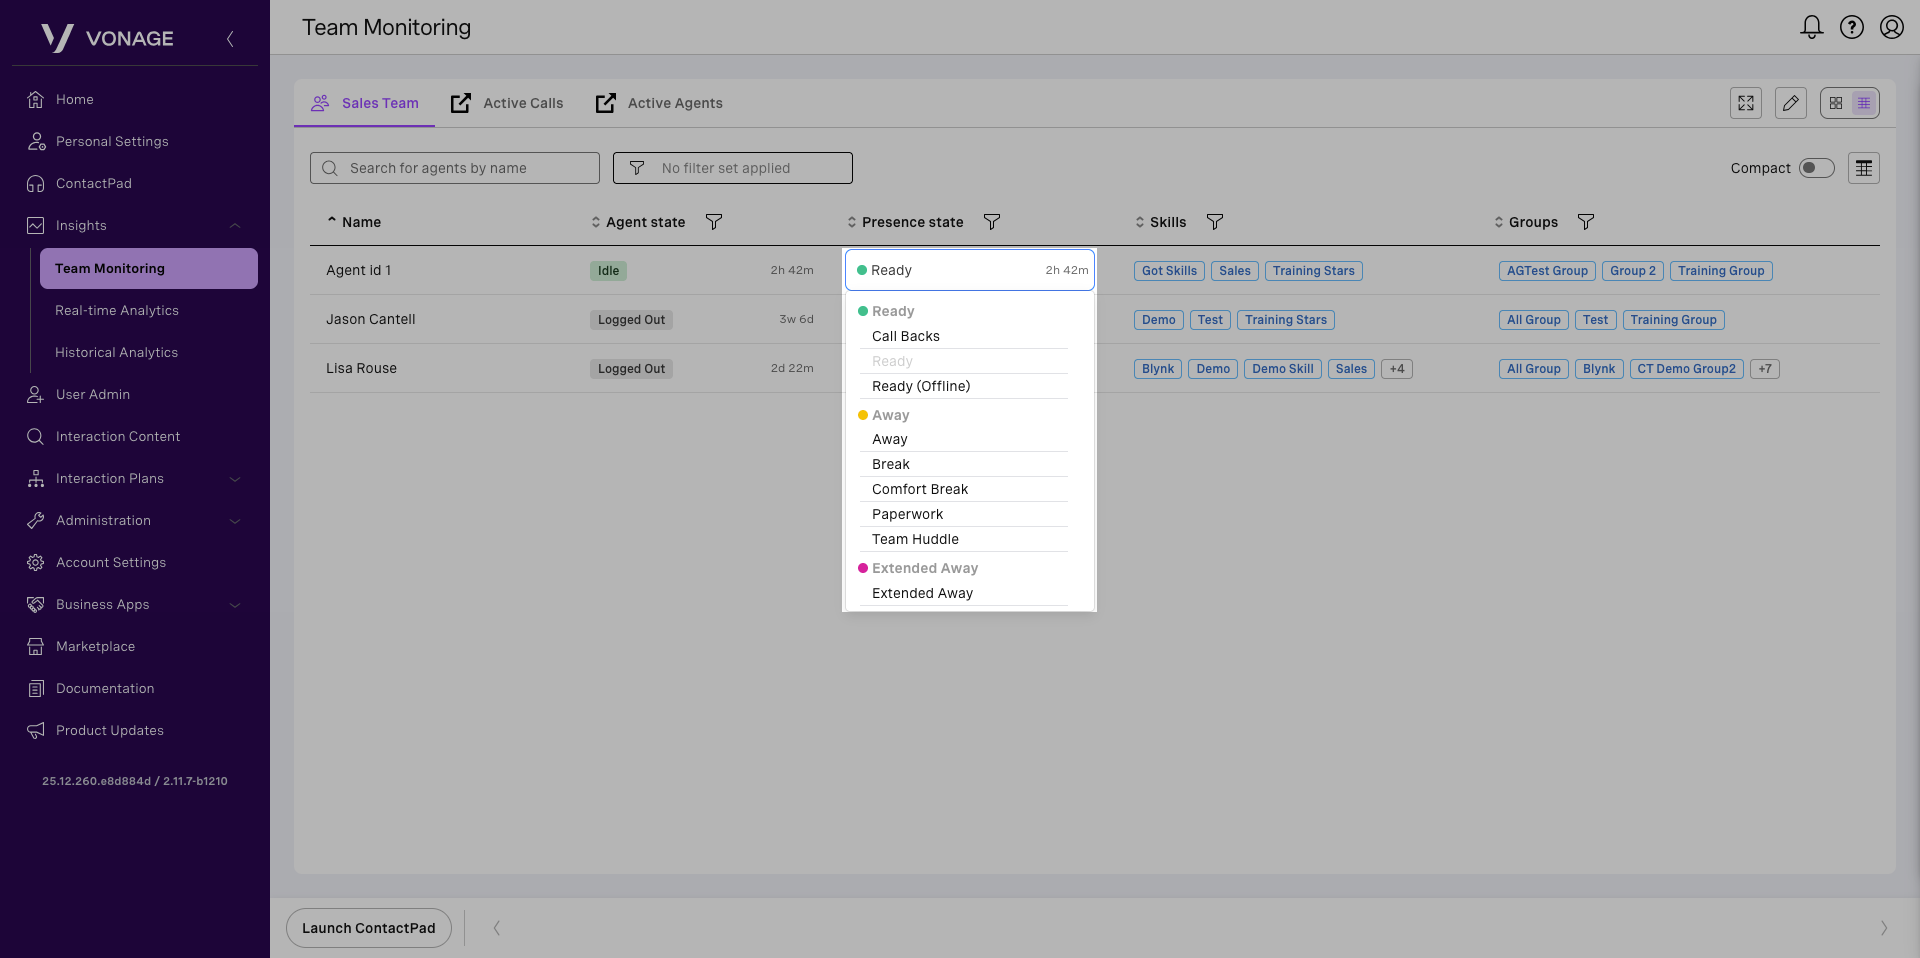
Manage an agent’s presence state
To change an agent’s presence state, locate the agent within the desired Team Monitoring dashboard. Click the agent’s presence state and then select the applicable presence state.
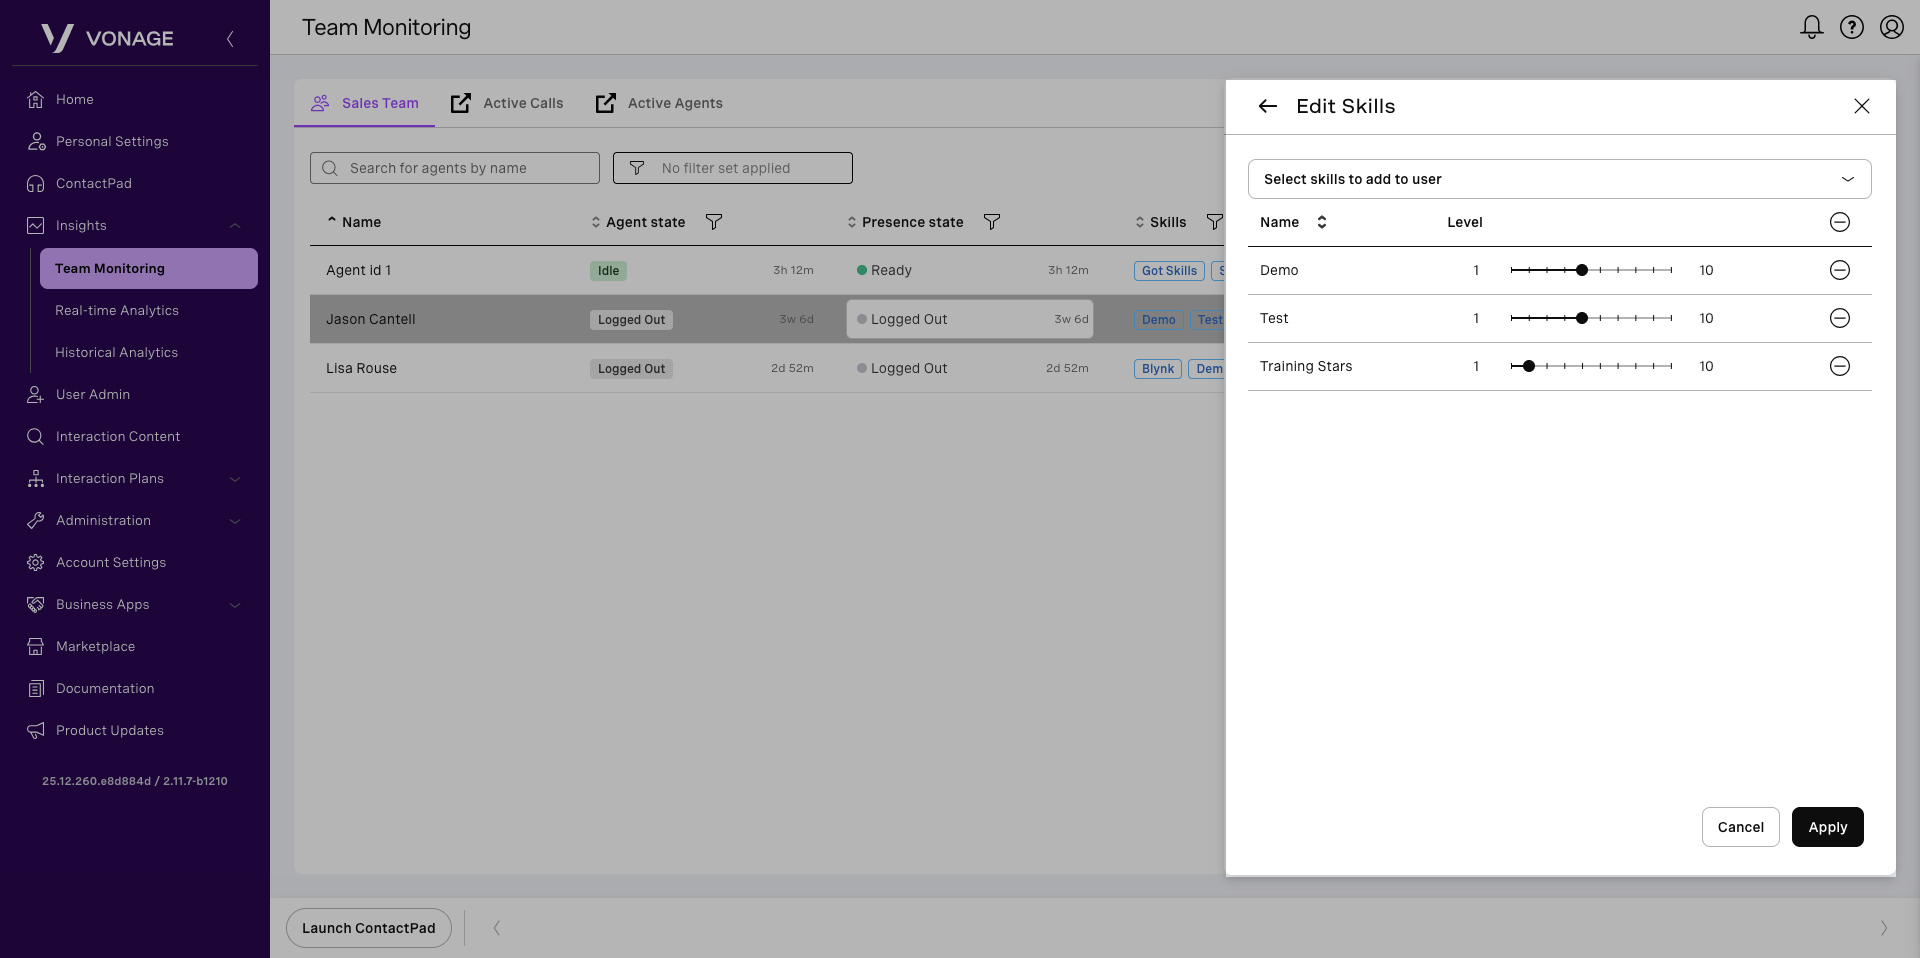
Manage an agent’s assigned skills
To change an agent’s assigned skills, locate the agent within the desired Team Monitoring dashboard. Click the agent’s row to expand their details in a side panel. Click the Edit User Skills icon. Edit skills appears and you can add skills, adjust skill levels for the user, or remove skills.
Note: If your queue is routed based on skill, this can affect the agent’s participation.
When you have made all your changes, click Apply.
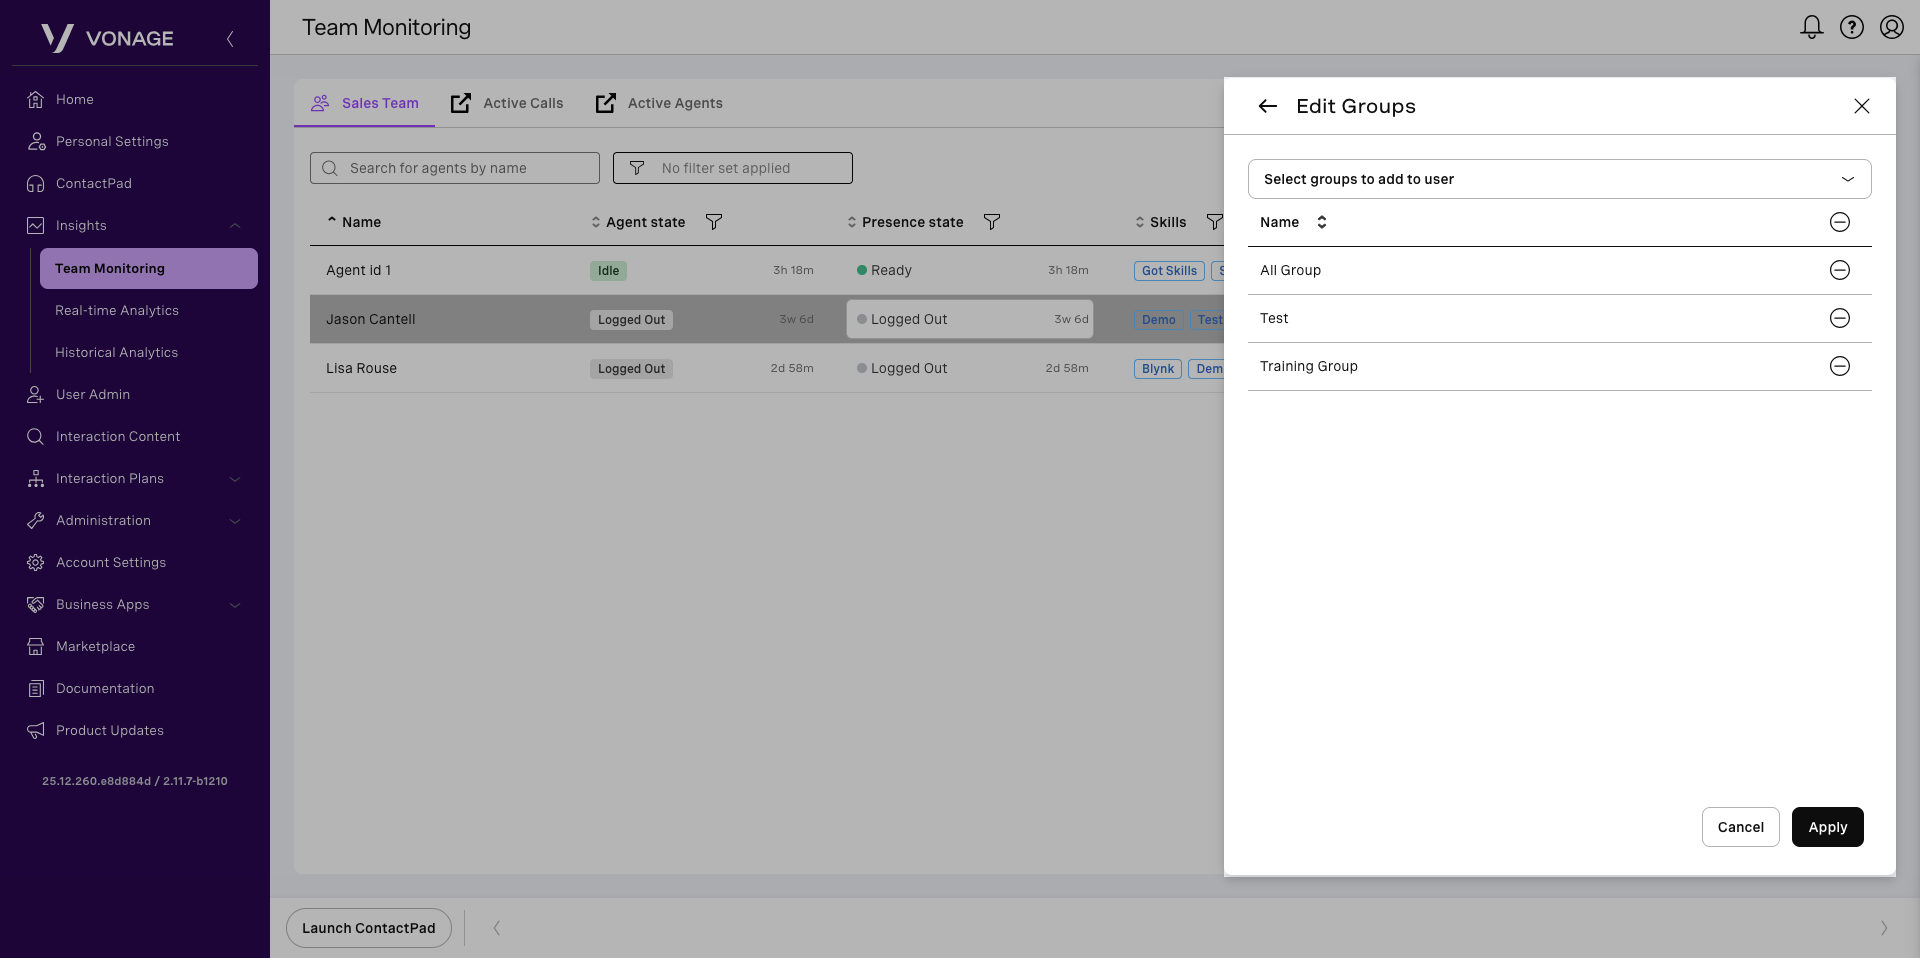
Manage the groups an agent belongs to
To change an agent’s group they are assigned to, locate the agent within the desired Team Monitoring dashboard. Click the agent’s row to expand their details in a side panel. Click the Edit User Groups icon. Edit groups appears and you can add or remove groups.
Note: To add or remove an agent, you must have access to the specific group you are adding the agent to or removing them from.
When you have made all your changes, click Apply.
Monitor interactions
Call center supervisors can monitor agents from Team Monitoring, locate the dashboard you wish to view, and click its row or title. The dashboard appears. Click on the agent you would like to monitor.
The following information about an agent appears:
- Agent’s name, a list of groups, and skills assigned to them.
- The agent’s current state and how long they have been in the state.
- A list of interactions the agent is currently working with. The following information is displayed for each interaction:
- Contact’s number or display name for outbound calls or queue name for inbound interactions.
- The state of the interaction and the time since the state last changed.
- A monitoring icon.
- A three-dot menu icon.
Click the Listen in monitoring icon to listen to the interaction.
For a more advanced form of monitoring, click one of the following monitoring modes after opening the three-dots menu:
- Listen in – Listen to the conversation between an agent and a contact. None of the participants are aware of being monitored.
- Coach – Listen to the conversation and talk to an agent. Only an agent is aware of your presence in the conversation.
- Join – Join the conversation in a conference mode, where all the parties can talk to each other.
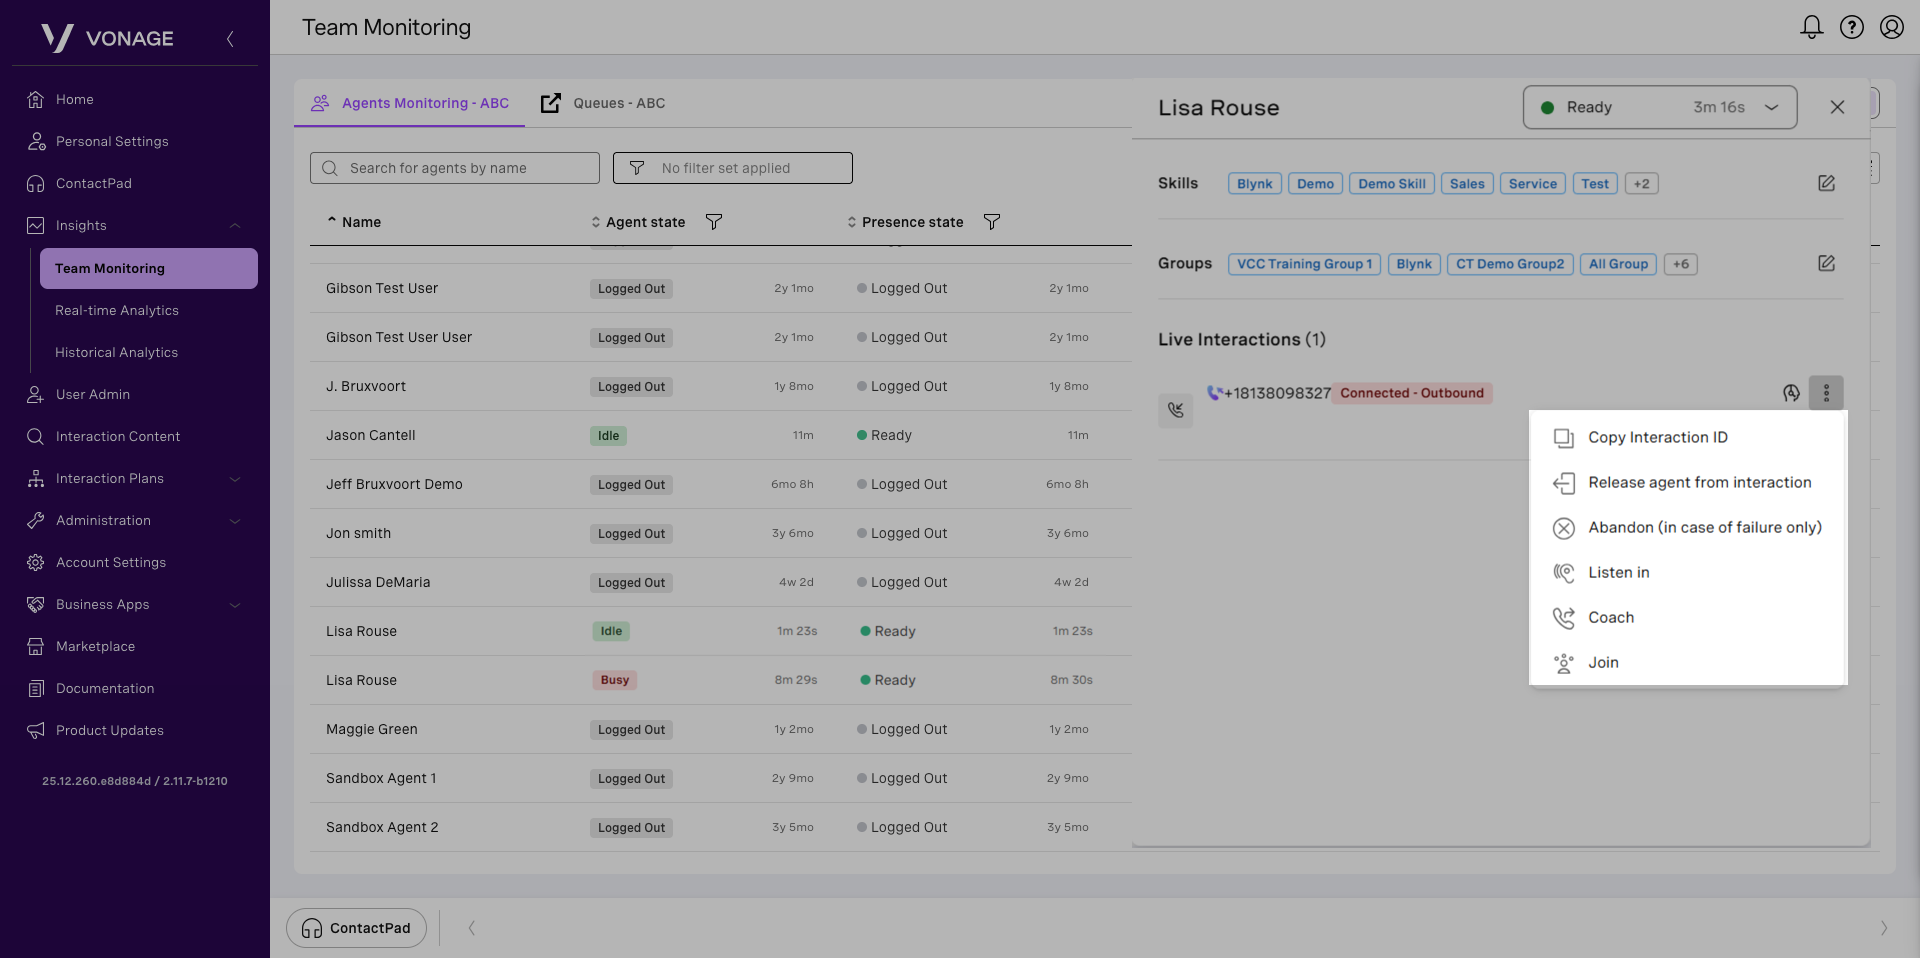
When you click a monitoring mode, your phone will ring and when you accept the interaction, you’ll be added as another participant to the call. Your participant’s state in the interaction will appear as Monitoring – Coaching or Monitoring – Joined.
Note: If using the desktop app, the contact pad must be open within the contact center portal.
To end the monitoring session, end the call and click the green contact pad icon to minimize the pad. Do not log out, this will log your of the contact center portal.