

User Admin (Admins)
Bulk Editing Users
You can make several changes to one or more users in the account you are logging into in the User Admin section by adding them to the Bulk Actions box. To add them to the bulk action box:
- Click on the Plus sign next to their name.
- Once the plus sign is clicked, the user appears in the bulk actions box.
- License Status – The license determines what tasks the user can perform in Vonage Contact Center and ContactPad.
- Agent Settings – This includes items like username, phone numbers, and location
Routing Settings - Permission Settings – These define which groups, queues, and lines a supervisor or wallboard user can view or manage in the VCC Admin Portal.
Note: If the user is voice-function-enabled or has a supervisor or wallboard license, you will see a black plus icon within their contact box, click the icon to add the user to the bulk actions box. If the user is an admin user and is not voice-function-enabled, the icon is gray and inactive.

To expand the box for bulk actions, click the Arrow in the Bulk action box. With the bulk actions expanded, you can make changes to the users in each of the following sections:

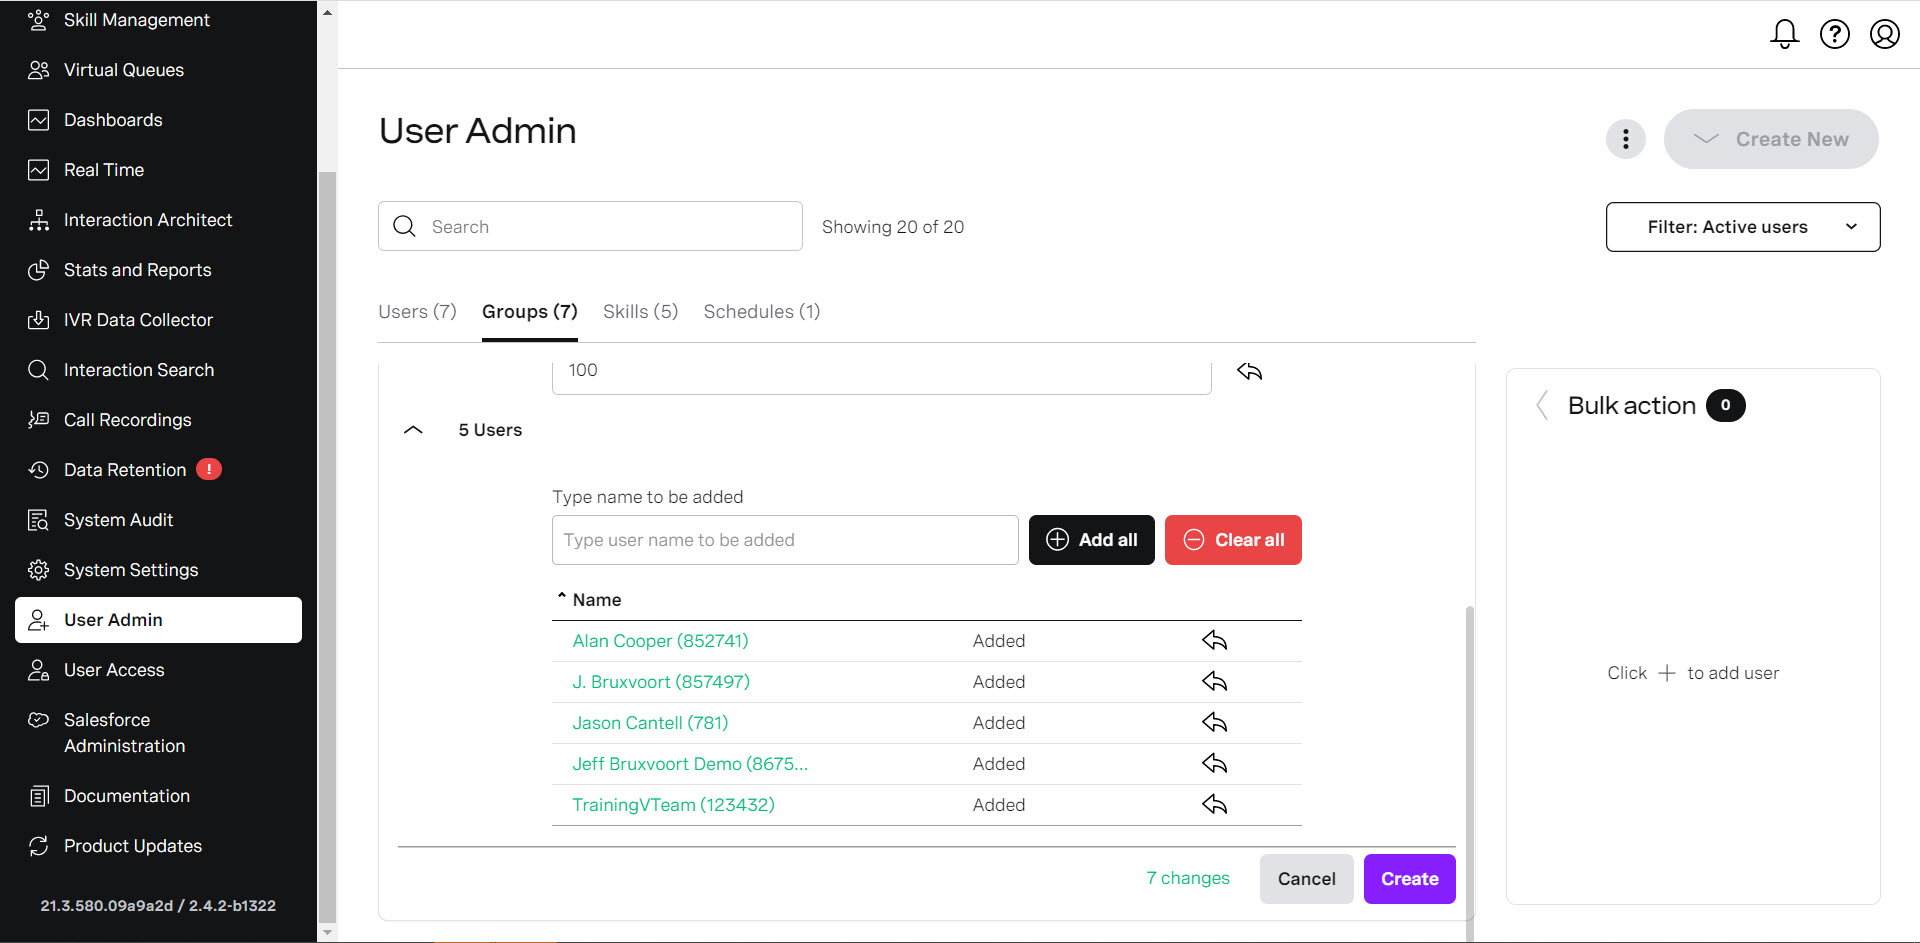
Create Groups
A group is a set of users that allow voice-functions. You must build groups and then connect users to those groups if you want to route interactions to unique user groups. To create a group:
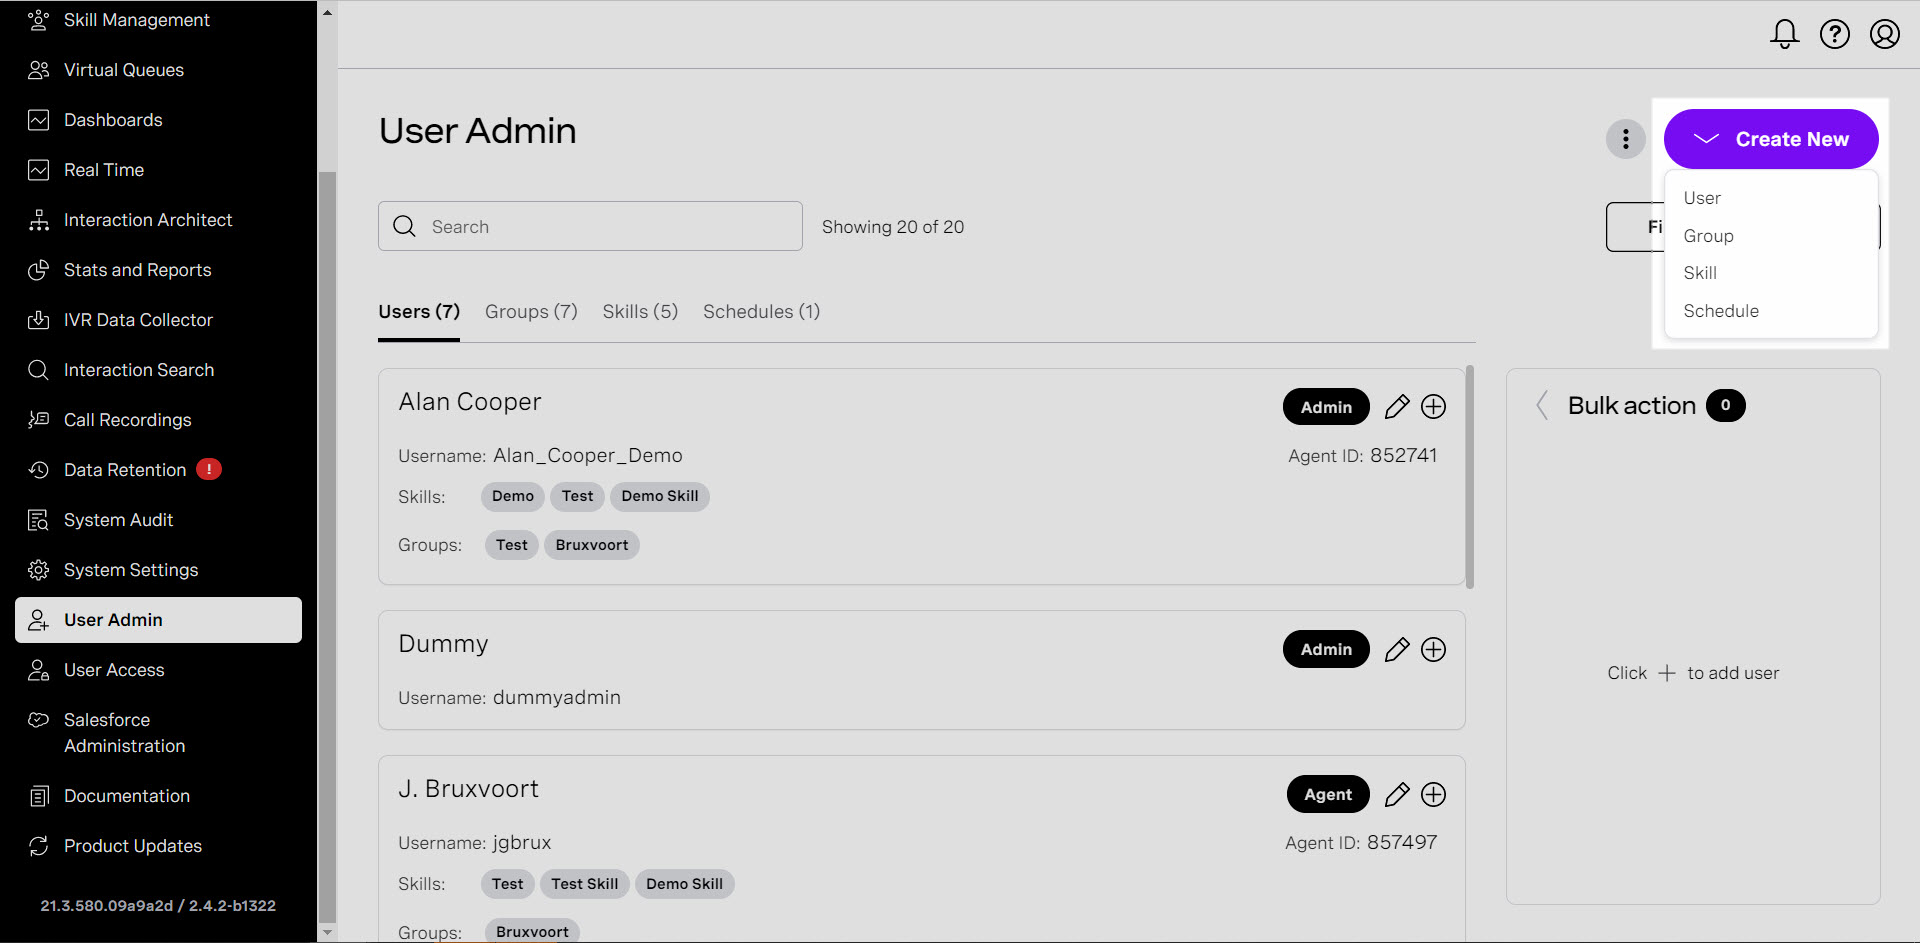
- From the User Admin page, click Create New.
- Then click Group.
- Enter the following information, if needed:
- Group ID
- Name
- Max Unexpected(s) – The max time an agent can be in any of the Unexpected or Fault states, such as No Answer, or Line Busy in seconds.
- Max WrapUp(s) – The max time, in seconds, that an agent in the group can be in the Wrap Up (Auto) state.
- Next, add agents to this group. To add agents, you can use the Search available agents field to search the agents by name.
- When you are finished, click Create.

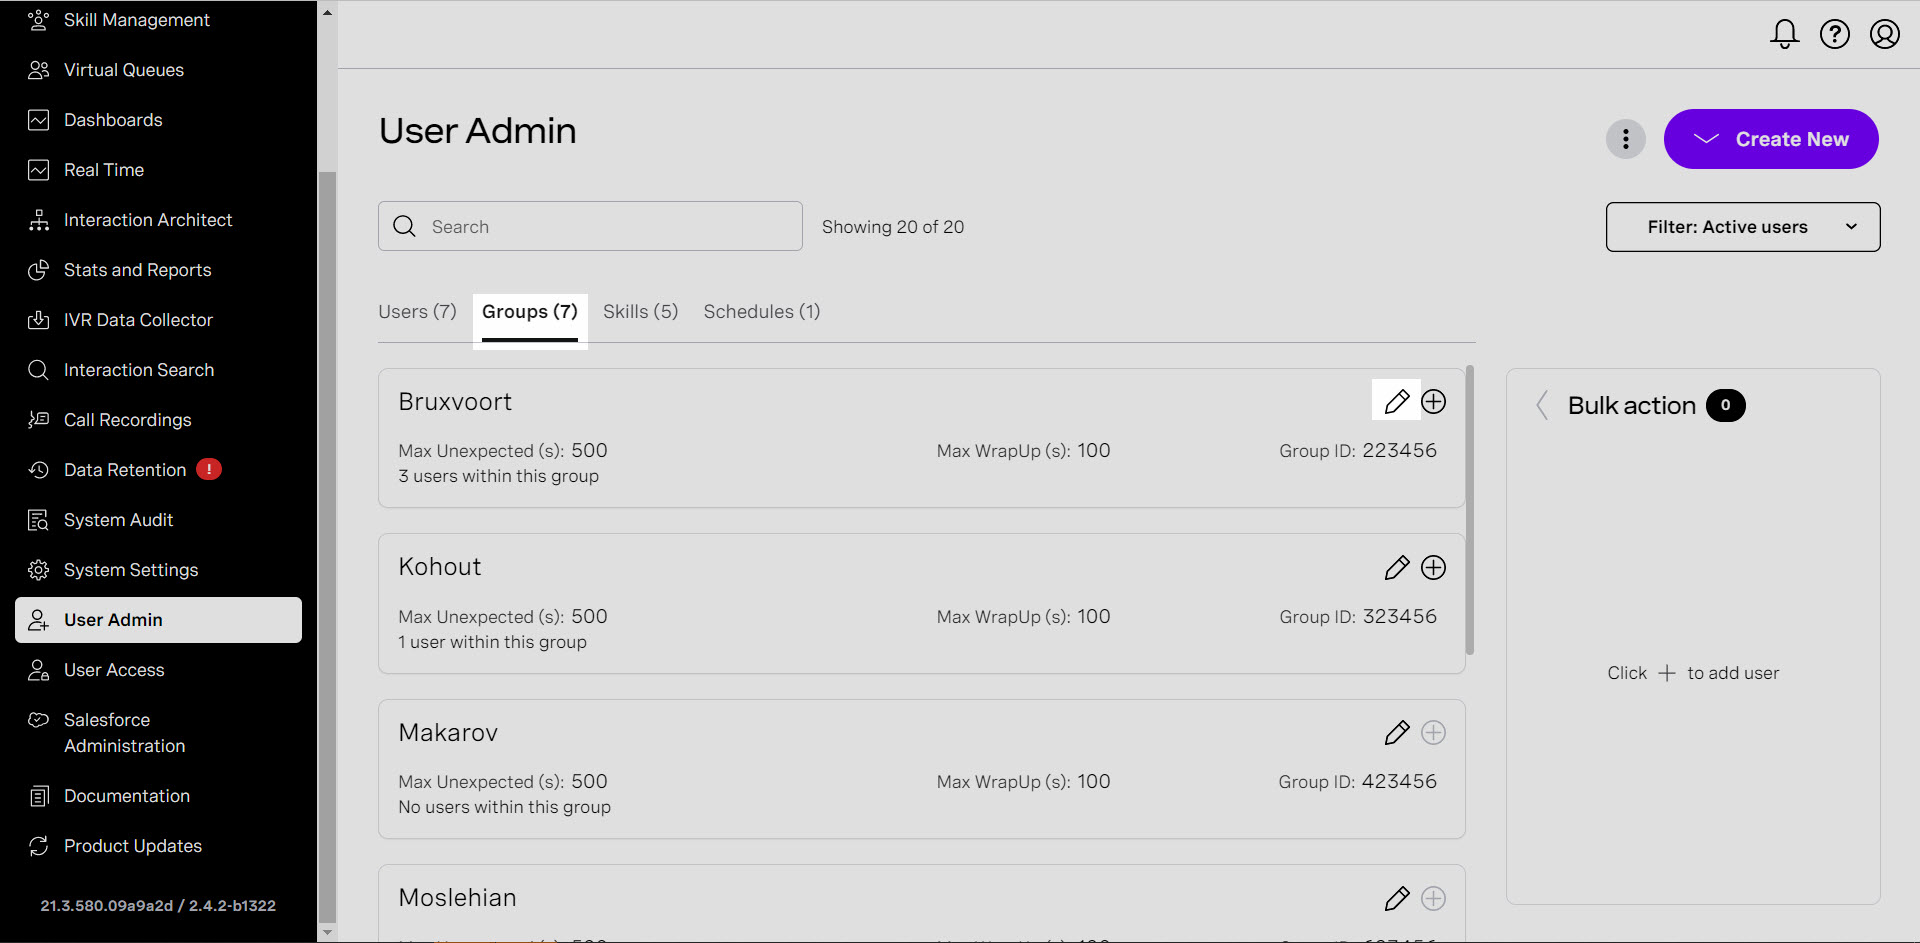
Editing Groups
To edit a group, go to the Groups tab on the User Admin page. Locate the group you wish to edit and click the Pencil icon. The group’s details appear. Update the information in the fields you wish to update. When you have finished making changes, click Update.
Creating Skills
Skills are attributes, such as a language, specific product knowledge, and so on, assigned to voice-function enabled users and required by interactions for skills-based routing decisions. To create a new skill, from the User Admin page:
- Click Create New.
- Select Skill.
- Enter the following information:
- Name – This will be the name of the skill.
- Users – This will house a list of users associated with this skill. To add a user:
- To assign the skill to a user, click in the text field and, optionally, start typing the user’s name to assign the skill to. A list of available users, filtered by any text you have typed, appears. Click the user or users you want to assign the skill to.
- If enabled for your account, the list of users includes the Level column. The level indicates how proficient a user is in the skill. Skill levels are used to determine which agent to route an interaction too.
- Once finished, click the Create button.

Editing Skills
To edit a skill, go to the Skills tab on the User Admin page. Locate the skill you wish to edit and click the Pencil icon. The skill’s details appear. Update the information in the fields you wish to update. When you have finished making changes, click Update.

Creating Schedules
A schedule is a collection of rules that define when Vonage will automatically log voice-function-enabled users out of ContactPad. To create a schedule, from the User Admin page:
- Click on Create New.
- Select Schedule.
- Enter the following information:
- Name
- Action – Logout is currently the only type of schedule that can be created
- Time Zone – The timezone of the times defined in the rules in this schedule.
- Rule X – This will apply rules to your schedule, in the first field, add the day or days on which the rule applies. Next, enter the time frame in which it will be in effect.
- Users – this will house a list of users associated with this skill. To add a user:
- To assign the skill to a user, click in the text field and, optionally, start typing the user’s name to assign the skill to. A list of available users, filtered by any text you have typed, appears. Click the user or users you want to assign the skill to.
- Once finished, click the Create button.
Editing Schedules
To edit a schedule, go to the Schedules tab on the User Admin page. Locate the schedule you wish to edit and click the Pencil icon. The schedule’s details appear. Update the information in the fields you wish to update. When you have finished making changes, click Update.
