

Introduction
Vonage Business Communications desktop application is a free desktop software that allows you to use and control your Vonage Business phone service from your personal computer. You can place and receive calls with the Desktop Application, send and receive text messages with Vonage Flow, show your customer contact history, control Call Forwarding Settings, and listen to voicemails.
How to Log into the Desktop Application Client:
To log into the Desktop Client:
- Open a browser and go to the following URL: https://app.vonage.com.
- When you are added to a Vonage Business Communications account as an End User, you will receive an email with a username and a link to set up your password.
For a Vonage Business Communications password to be successful, it must meet the following requirements:
- Must be different from any of the previous 5 passwords
- Contain between 8 and 50 characters
- Contain an uppercase character
- Contain a lower case character
- Contain a number (ex. 7)
- Contain a special character (ex. $)
- Once Complete, you will be logged into the Vonage Communications Desktop App.
Please Note: If you have already created your password and are returning to the portal, you need only to Enter your Username and Password and select Sign In.
How to Place Calls:
Upon sign-in, the Calls page will be the first page you see. The Calls page is broken into two distinctive areas, the first area being your Call Log window. Here, you can view all incoming and outgoing calls as well as missed calls. The second section of the call page houses all the caller information. This page will change depending on the caller you select and show all the available data for the said caller.

To place a call from the call page:
- Click on the New Call button. The dial pad window will appear.
- Enter a valid extension or 10-digit number.
- Click the Call button. The Call will now be placed and show at the top of the dashboard screen.

You can also place a call from your company’s directory, to do this:
- Click on the New Call button to make the dial pad window appear.
- Proceed to click on the Directory icon here. The dial pad disappears and is replaced with your Contact list.
- You can either search for a contact with the search field or locate it manually from the list below.
- Once the contact is found, hover over their name and click on the blue phone icon to complete the call.

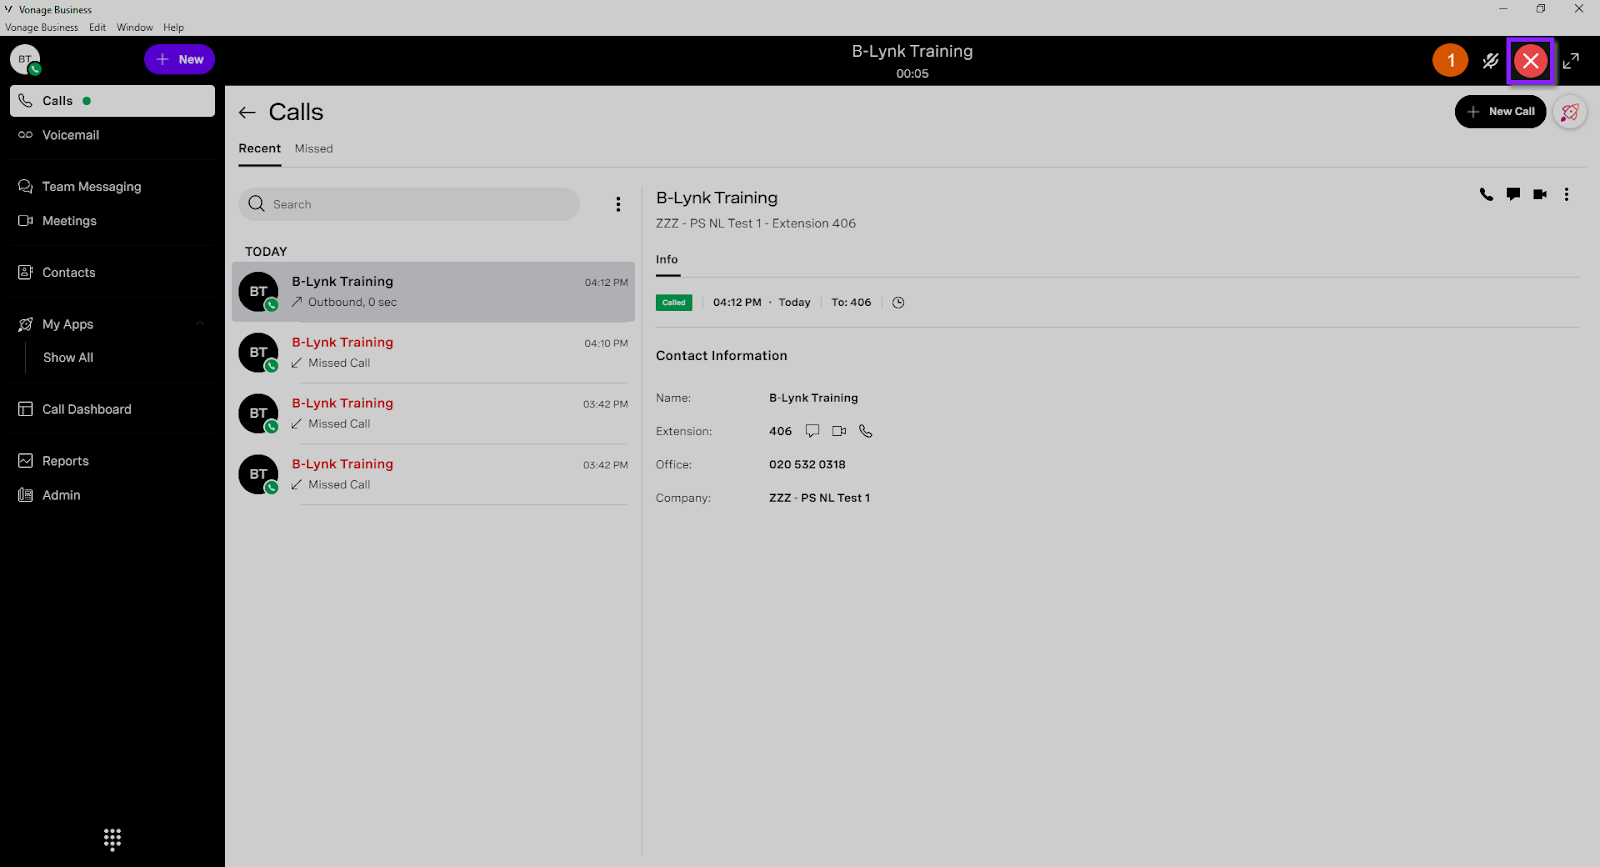
To end a call:
- Press the end button located here. This will stop the currently active call.
To transfer a call:
- A Blind (or unannounced) Transfer takes place when you transfer a call to someone else without announcing the call first. To conduct a blind transfer, while on an active call:
- Click the Transfer button.
- Proceed to select Blind Transfer.

- From the Contact panel, select the recipient you wish to transfer to.
- Click the Transfer button. Your call will now be transferred.

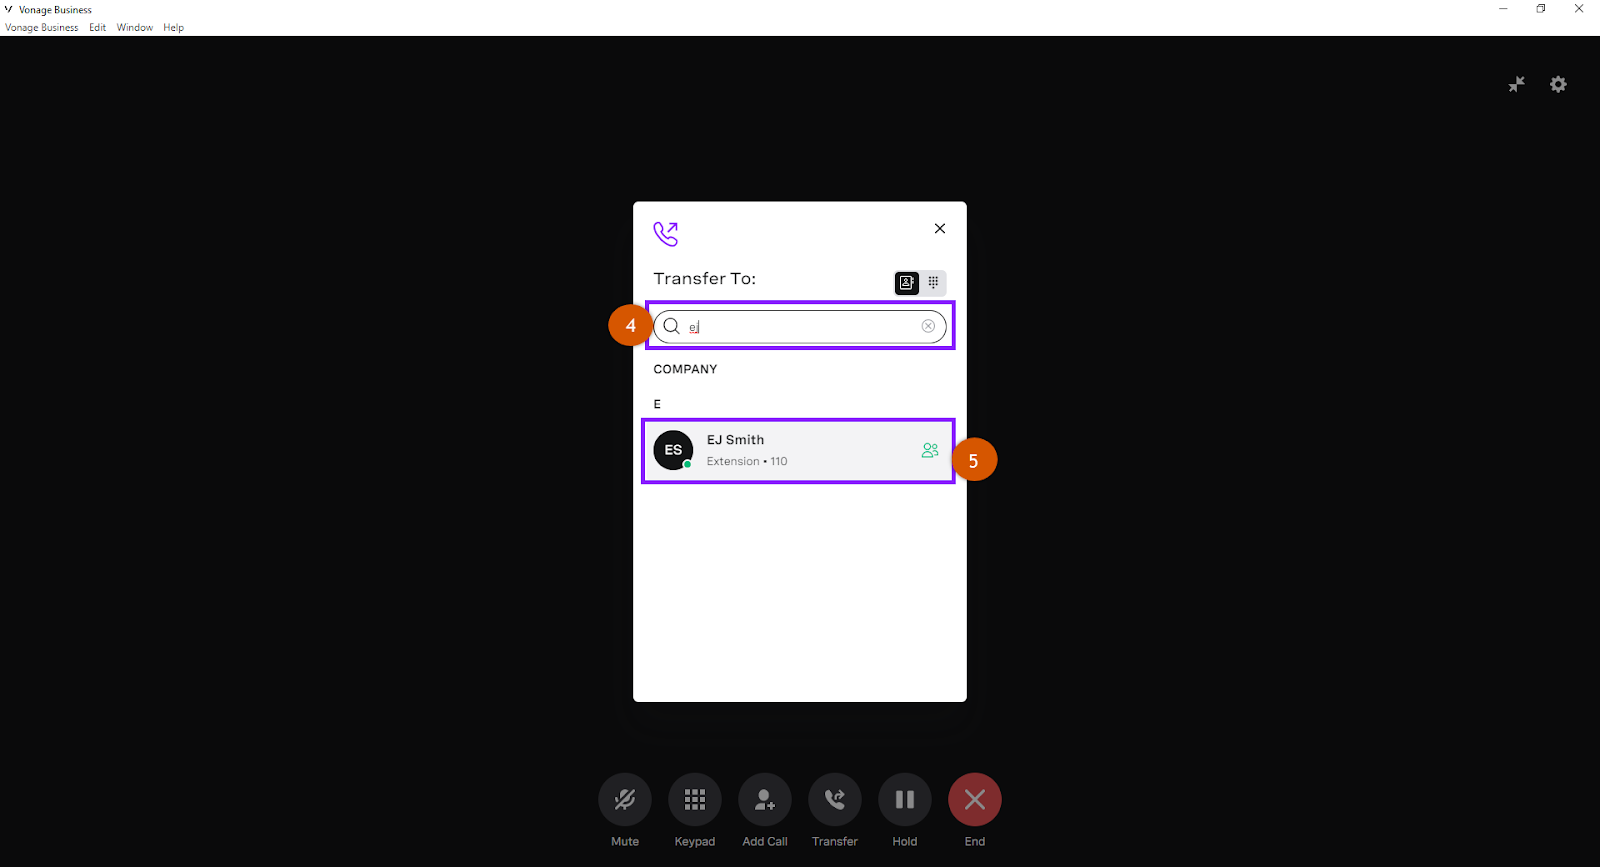
You can also transfer to another recipient via the Dial Pad. From the Transfer To window:
- Click the Dial Pad icon.
- Enter the valid extension or 10-digit number.
- Click the Dial button. Your transfer is now complete.

- A Consulted (or announced) Transfer is performed when you announce the call to the recipient prior to transferring the call. To conduct an attended transfer, while on a call:
- Click the Transfer button.
- Proceed to select an Attended Transfer.
- From the Contact panel, select the recipient you wish to transfer to.
- Click the Call Button.
- When the party answers, announce the call and click transfer one last time. Your call will now be transferred.

You can also transfer to another recipient via the Dial Pad. From the Transfer To window:
- Click the Dial Pad icon.
- Enter the valid extension or 10-digit number.
- Click the Dial button.
- When the party answers, announce the call and click transfer one last time. Your call will now be transferred.

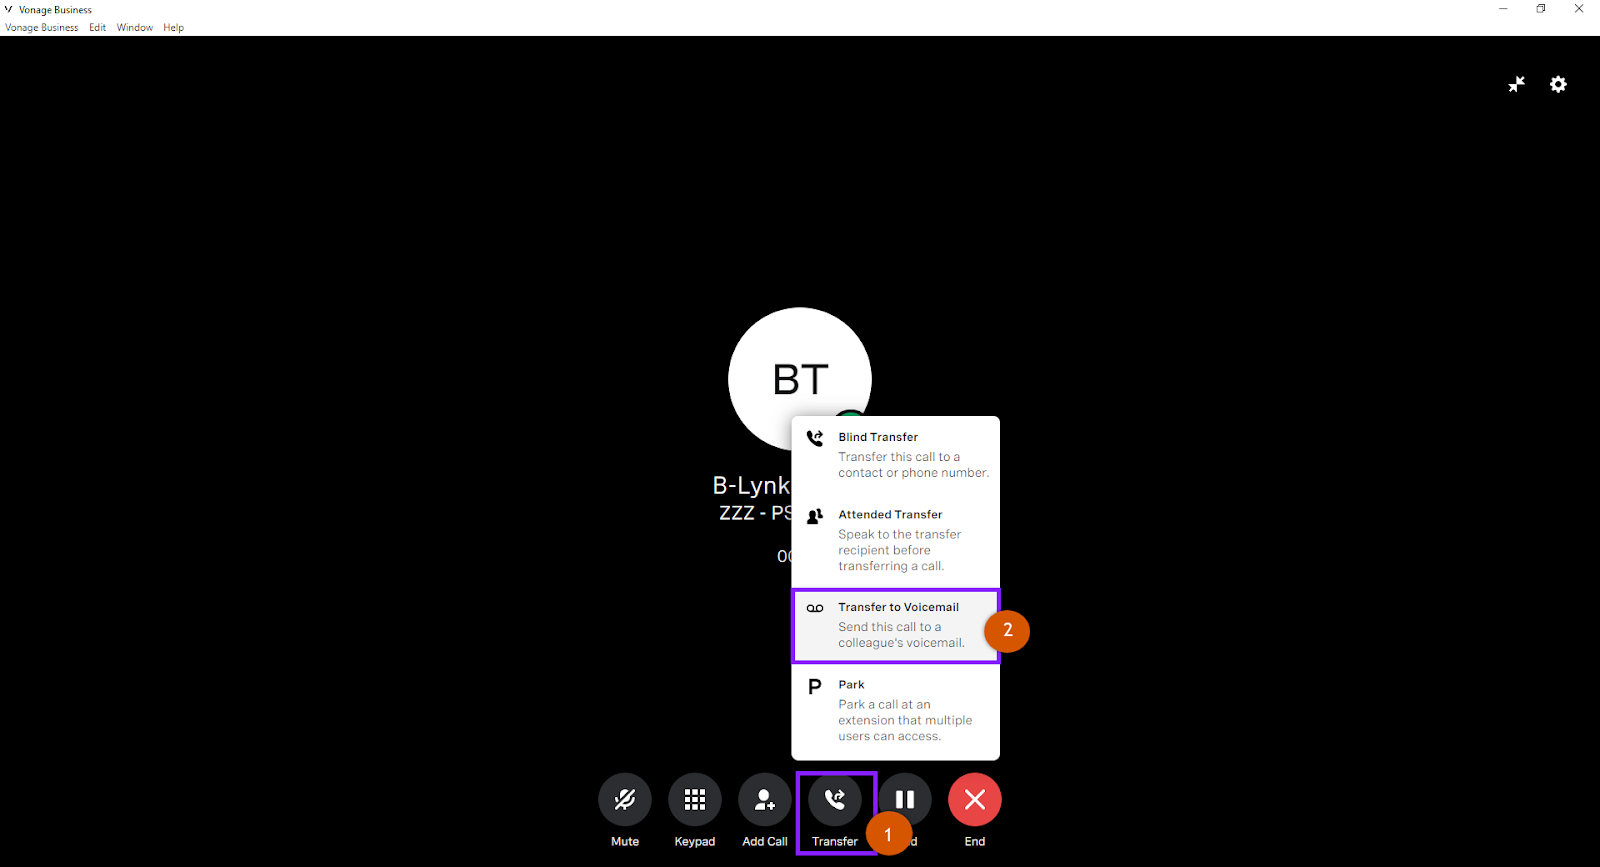
- A Direct-to-Voicemail Transfer is performed when you wish to transfer a call directly to another user’s voicemail. To conduct a transfer to voicemail, while on an active call:
- Click the Transfer button.
- Proceed to select Transfer to Voicemail.
- From the Contact panel, select the recipient you wish to transfer too and click the Transfer Button. Your call will now be transferred to their voicemail.

To Park and Unpark a call:
To park a call while on an active call:
- Press the Park icon.

- The call will now be displayed within the table of the Parked Calls areas on the Receptionist console.
- To retrieve a Parked call, click the Answer button next to the parked call, or, from the dial pad, dial *104 and listen to the prompts.
How to access your voicemail:
To access your voicemails, click on the Voicemails tab. This page is broken into two separate areas. The first area is your voicemail window. This is where your voicemails are stored, usually by date in chronological order. The second area houses all the voicemail information and is found to the right of the voicemail window.

To listen to a message:
- Select the message in the voicemail window. The message information will display to the right.
- Click the Play Button.
- Your message will now be played.
To download the message as a .wav file:
- Within the information window, click the Download Button.
- Proceed to save the file to your computer.
To email, a voicemail message to yourself:
- Click the envelope icon.
- Proceed to enter a valid email address.
To delete a voicemail message:
- Click on the trash icon.
- A verification will appear to confirm your deletion.
- Click Delete. Your message will now be removed from the voicemail section.
How to access your Contacts:
To access your contact directory, click on the Contacts tab. This page is broken into two separate areas. The first area being your contact list window giving you access to the Directory contact list and your contact list. The second area houses all the contact information and is found to the right of the contact list window. This section will change depending on the selected contact.

How to add new Contacts:
To add a new contact:
- Click on the New Contact button.
- The add contact window appears.
- Insert the necessary information in the appropriate fields.
- When finished, click on the Save button. You should now see your contact listed in the My Contact table.

To delete a contact:
Note: Contacts can only be deleted from the My Contacts tab
- While in My Contacts, select a contact and click on the trash icon to the right of the contact.
- A verification box will appear to confirm your deletion.
- Click Delete. Your contact will now be deleted.

If you have more than one contact, you wish to delete:
- Click the trash icon within the My Contacts window window.
- Select the contact or contacts you want to delete by selecting the checkboxes next to each contact.
- When finished, click Delete.
- A verification box will appear to confirm your deletion. Click Delete. Your contacts will be deleted.

To add a contact as a favorite:
- Click on the star icon either here or within the contact information screen.
- Once clicked, the star will change to solid yellow, and you will now see that contact within your Favorites list.

To remove a user from Favorites:
- Click on the Star icon again.
- You will see it’s removed when the star reverts to it’s outlined form.
How to create a Team Message:
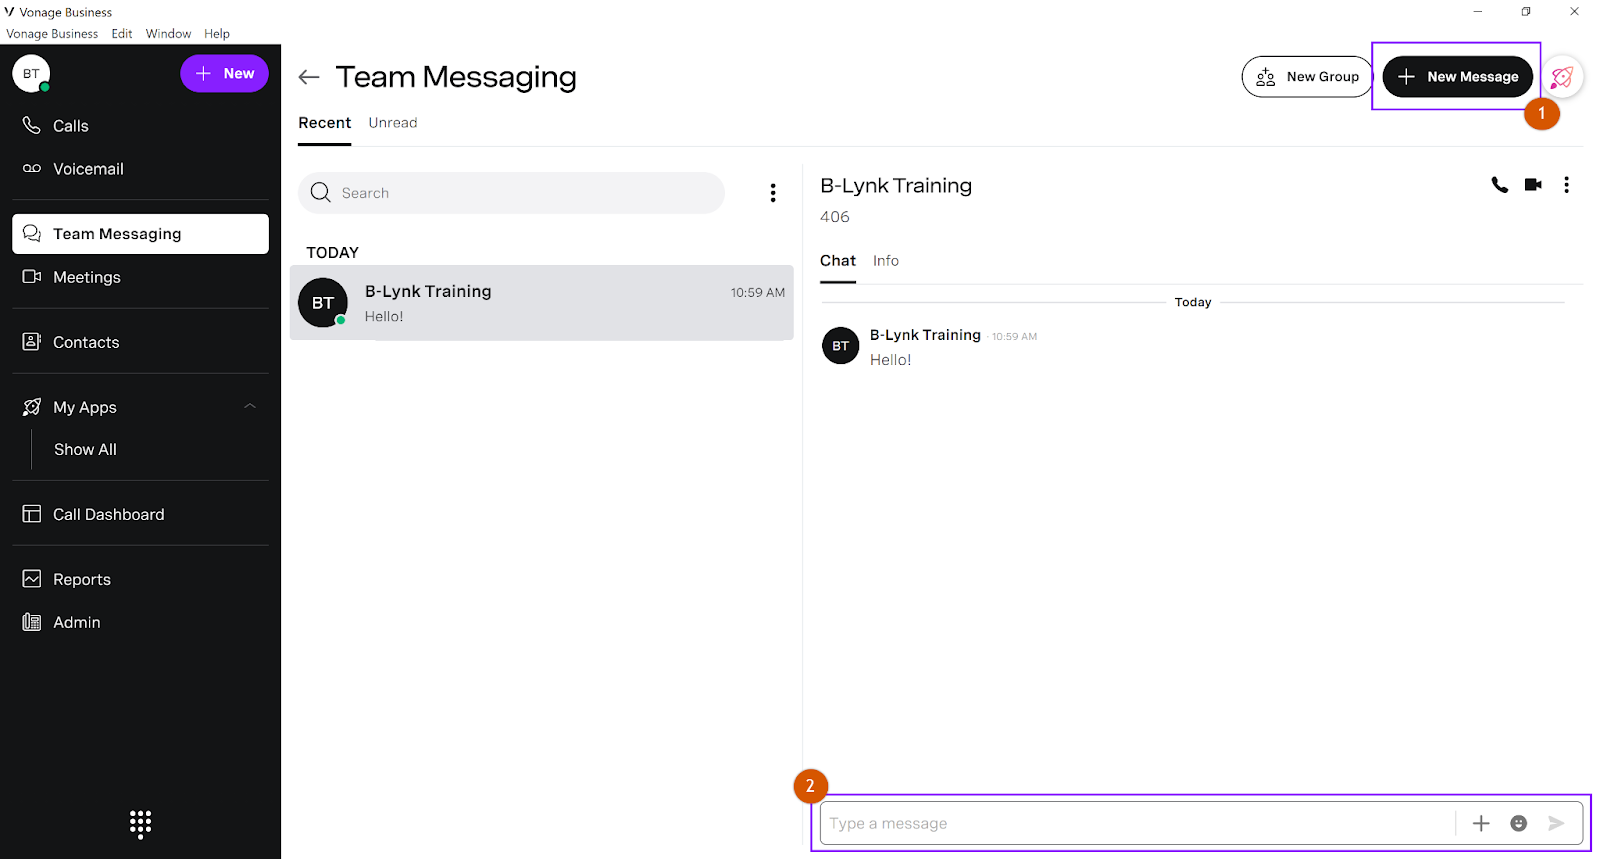
To access your Team Messages, click on the Team Messaging tab. This page is broken into two separate areas. The first area is your team messaging window. This is where your team messages are stored, usually by date in chronological order and recipient. The second area houses all the team message information and is found to the right of the team messaging window. This section will change depending on the selected team message.

To send a new team message:
- Click on the new Message Button.
- Enter the recipient’s name and click the green arrow icon.
- Proceed to enter your message within the Type Message Here field in the information area.
- Press enter when you are ready for your message to be sent.
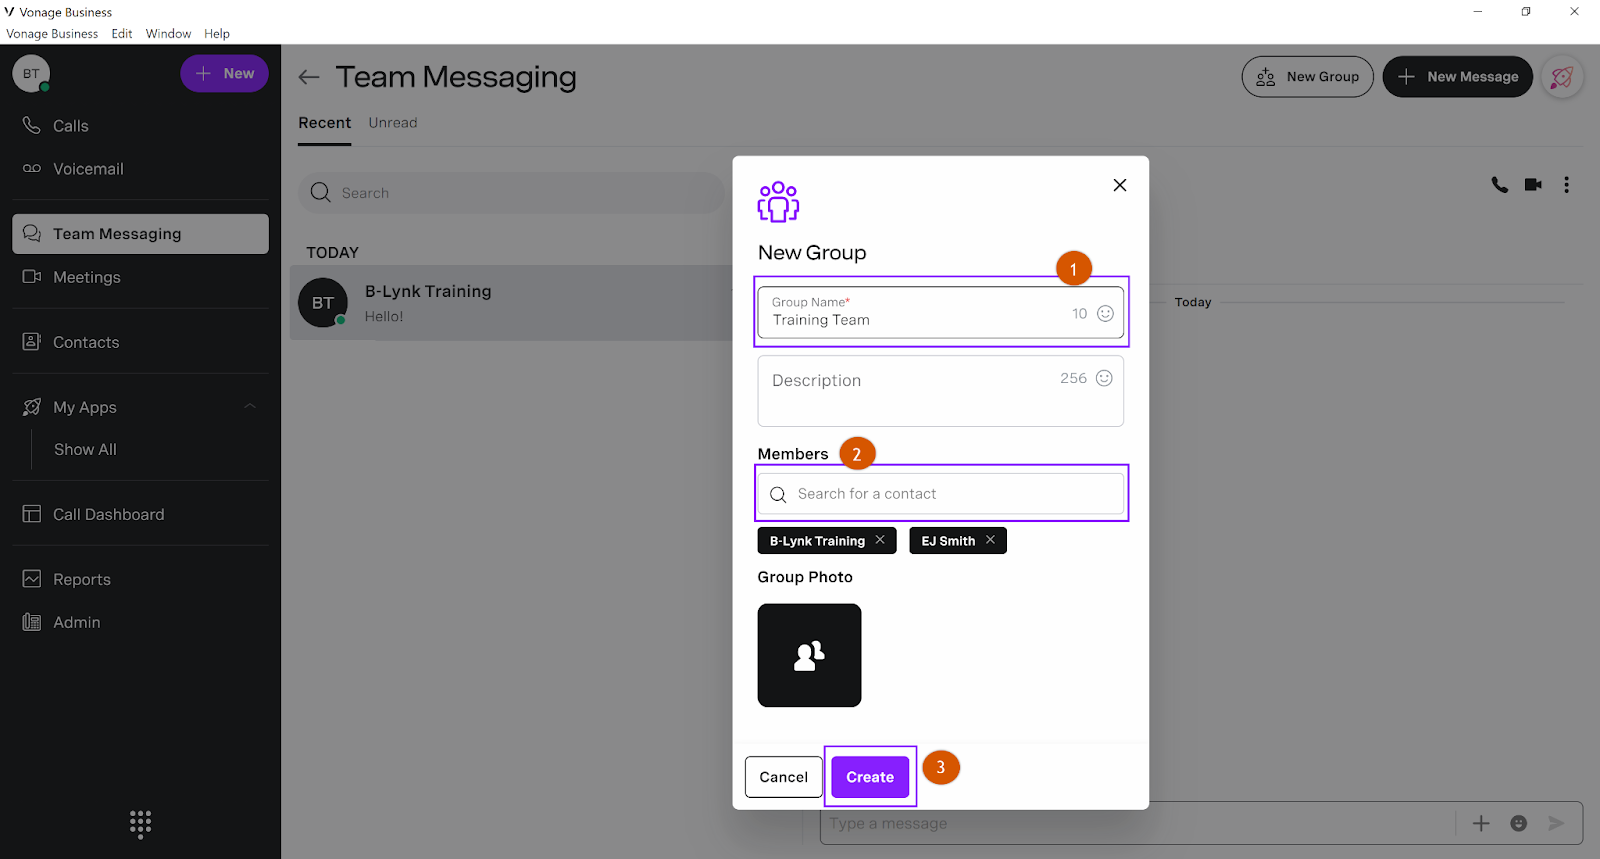
To create a new group:
- Click on the New Group icon. The new Group window will appear.
- Proceed to name the group chat.
- Once complete, add recipients by selecting from the contact list.
- Once finished, click create.
- You should now see your newly created group within the Team Messaging window.
To send a new group team message:
- Click on the group within the team messaging window.
- Proceed to enter your message within the Type Message Here field in the information area.
- Press enter when you are ready for your message to be sent.
How to access and create meetings:
To access Meetings, click on the Meetings tab. This page is broken into two separate areas. The first area is your meetings window. This is where your meetings are stored, usually by date in chronological order. You can sort through these meetings by All Meetings, Ended meetings, or Missed meetings. The second area houses all the meeting information, including the time and date, participants, and meeting messages. This is found to the right of the meetings window. This section will change depending on the selected meeting.
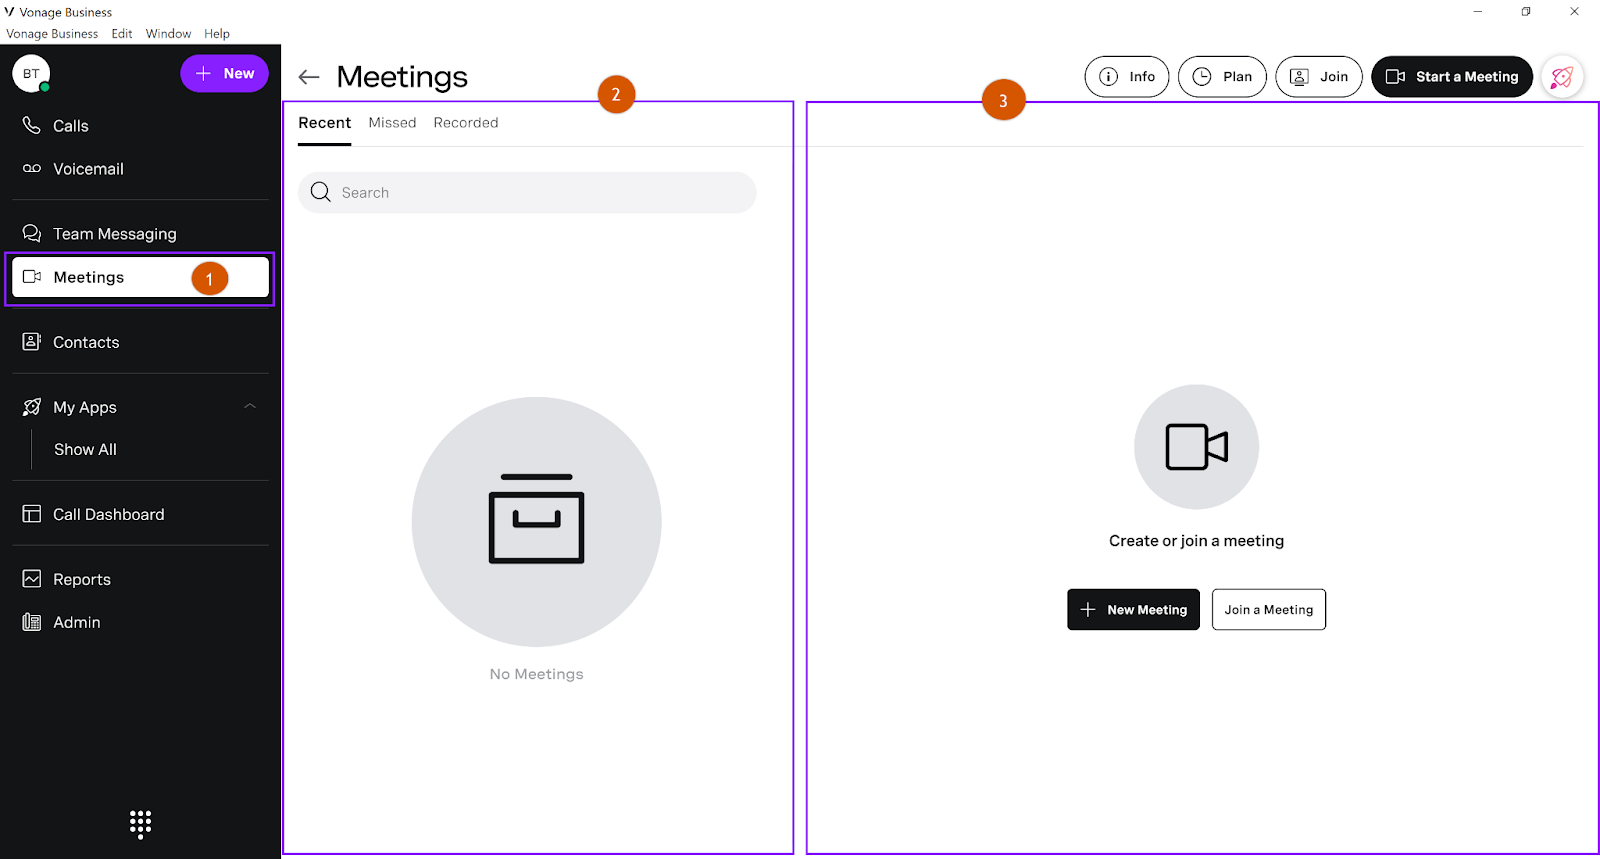
To create a new meeting:
- Click on the New Meeting button. The new Meeting Window Appears.
- Proceed to select the Meeting participants from the contact list below.
Please Note: If you have outside guests joining the meeting, make sure you copy your Dial-In and WebLink info to your clipboard by clicking on the Copy to Clipboard button. This is the information you will send to them via email to gain meeting access.

- Click Start Meeting. The Vonage Meetings window will appear with your current participants already in the meeting space. If you have outside guests joining, wait for them to enter before starting your meeting.
Once your meeting is concluded, it will appear in your meetings window.